Use Okta as your Authentication Provider
This guide will walk you through the steps necessary to configure Okta as the authentication provider for your instance of Okteto.
Please refer to Okta's official documentation on Open ID Connect for more information.
Prerequisites
- A working installation of Okteto
- Helm 3.0+ installed in your local machine.
- Access to an Okta Workforce Identity Cloud account with permissions to create Applications.
Create the Okta Application
Create a new app integration, using the values below:
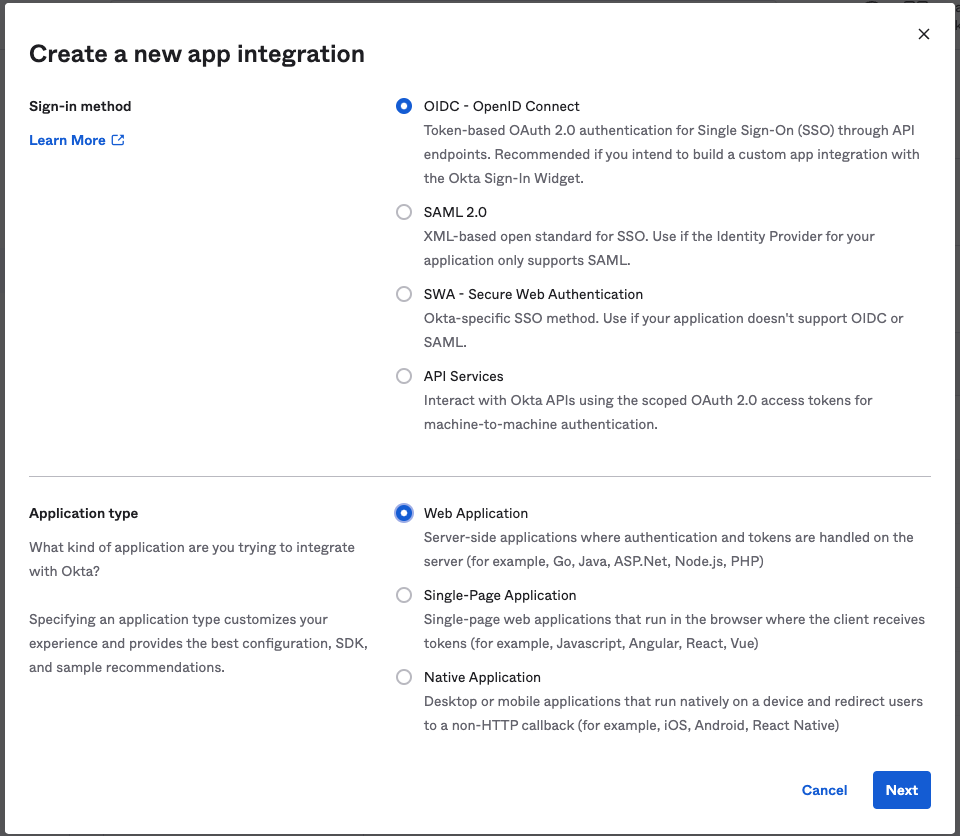
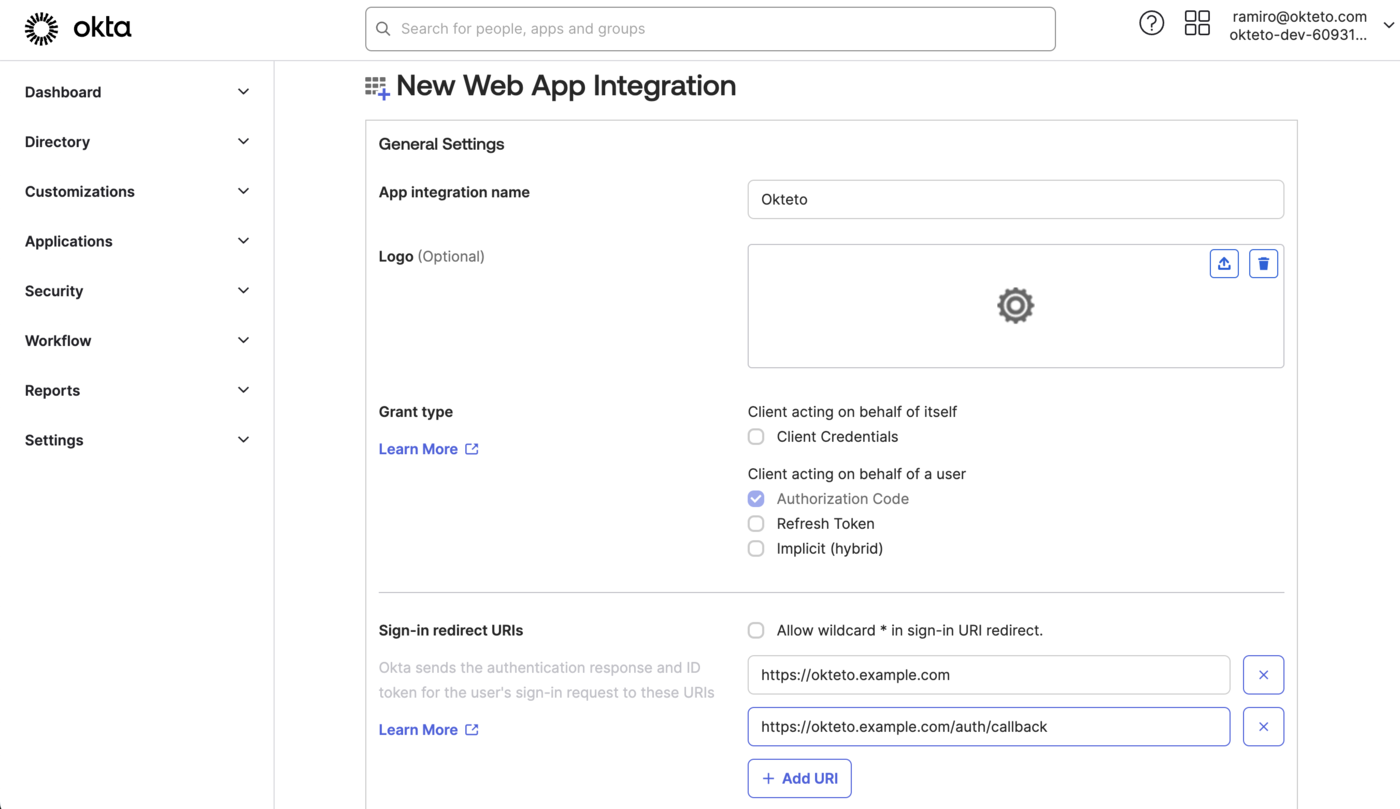
Then, fill in the following values on the “New Web App Integration” window:
- Name: The name of your app (e.g. Okteto)
- Grant type: authorization code
- Sign-in redirect URIs:
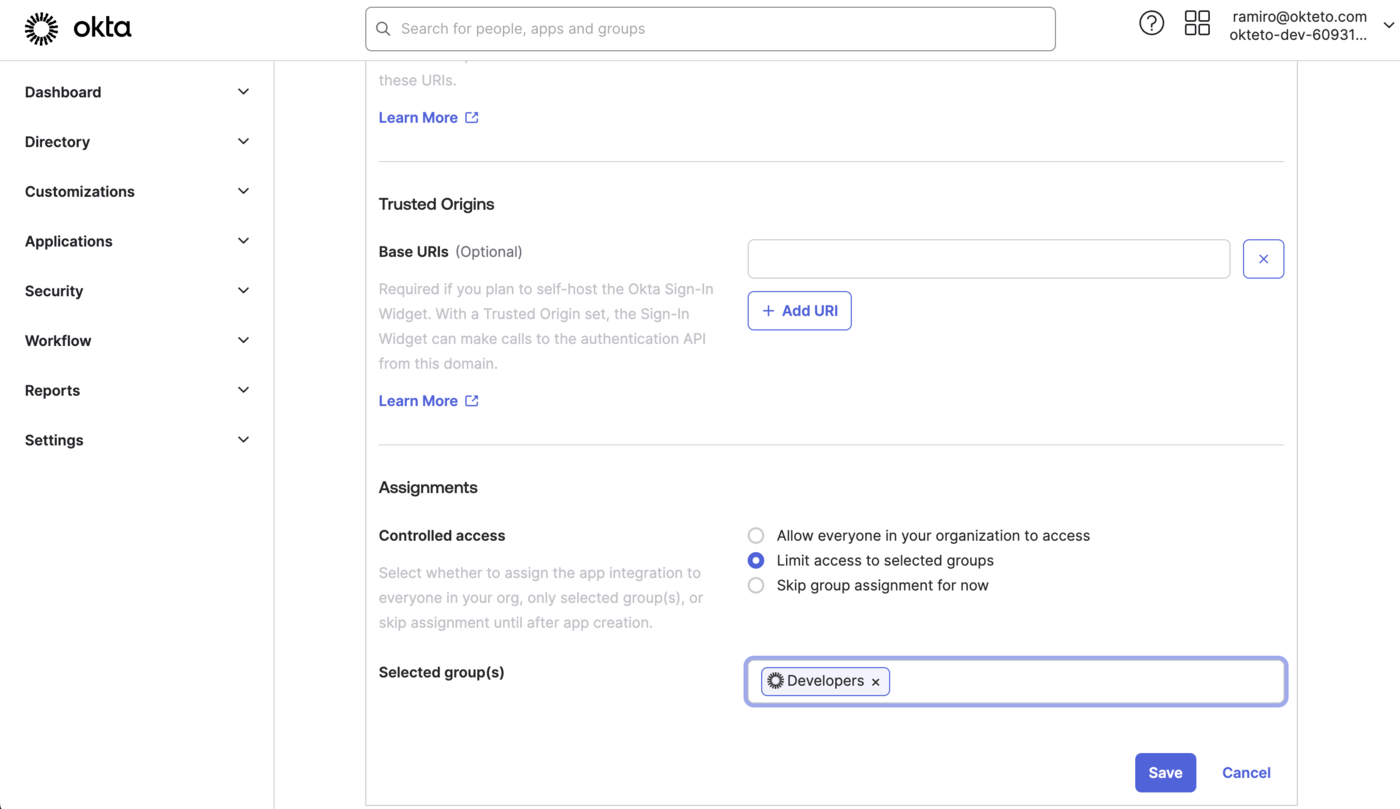
https://okteto.{YOUR_DOMAIN}&https://okteto.{YOUR_DOMAIN}/auth/callback - Assignments: We recommend you create a dedicated group for Okteto, so you can control who can access your instance from Okta.
Leave all the other values empty, and press the save button.
Once the application has been created, copy the ClientID and the Client Secret values.
You'll need them to configure Okteto.

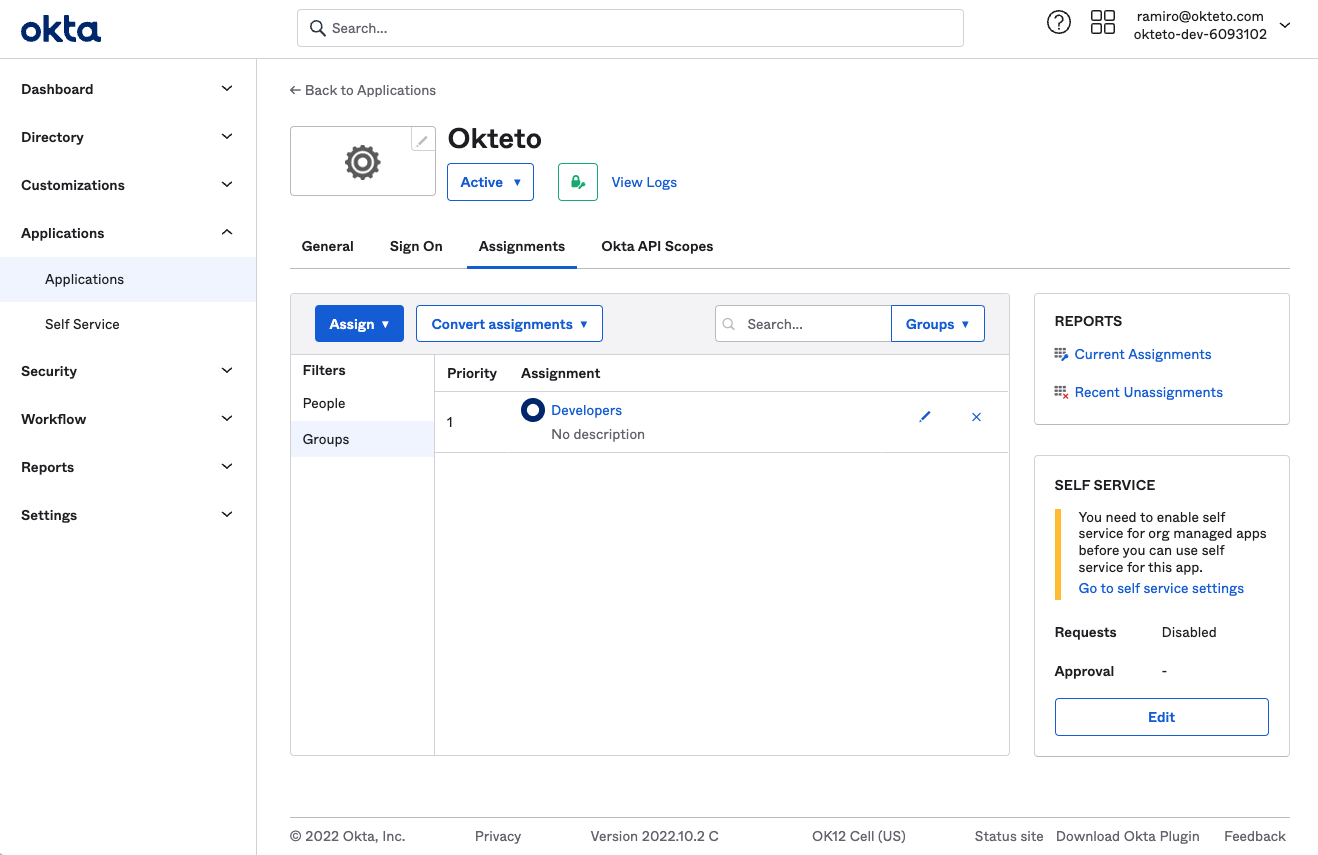
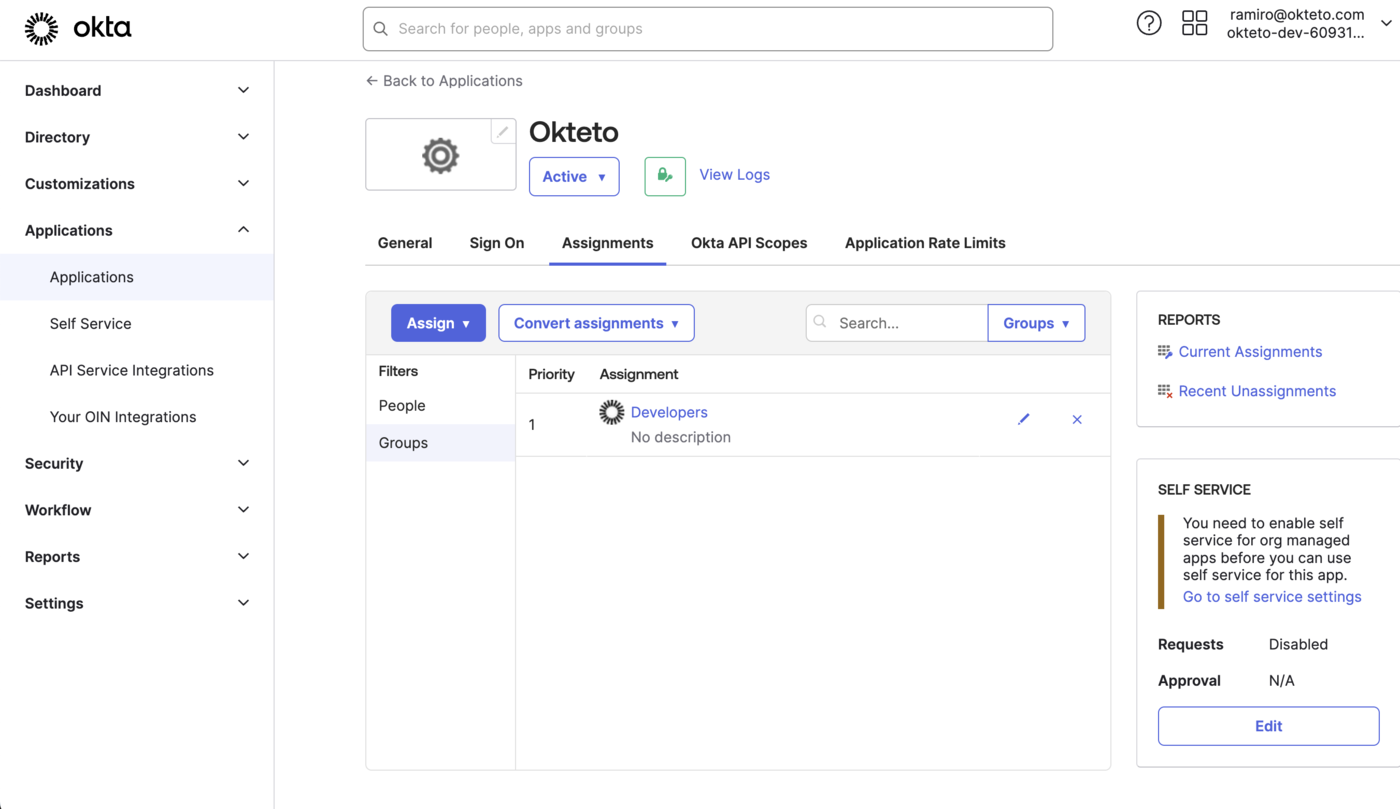
Assign the users or groups that will have access to Okteto to the application that you just created.
By default, Okteto will use the attributes below when creating a user. These will be synchronized when the account is created, and every time the user logs in.
Nameas the display name of the user.Nicknameas the username of the user.Emailas the email. Addresses must contain only lowercase alphanumeric characters, '-', or '.'Picture URLfor the user's profile picture.
Authentication will fail if the Nickname or Email property is missing or empty. Please refer to the Customize the attributes that Okteto consumes section below on how to change the attributes that Okteto will use during authentication and account creation.
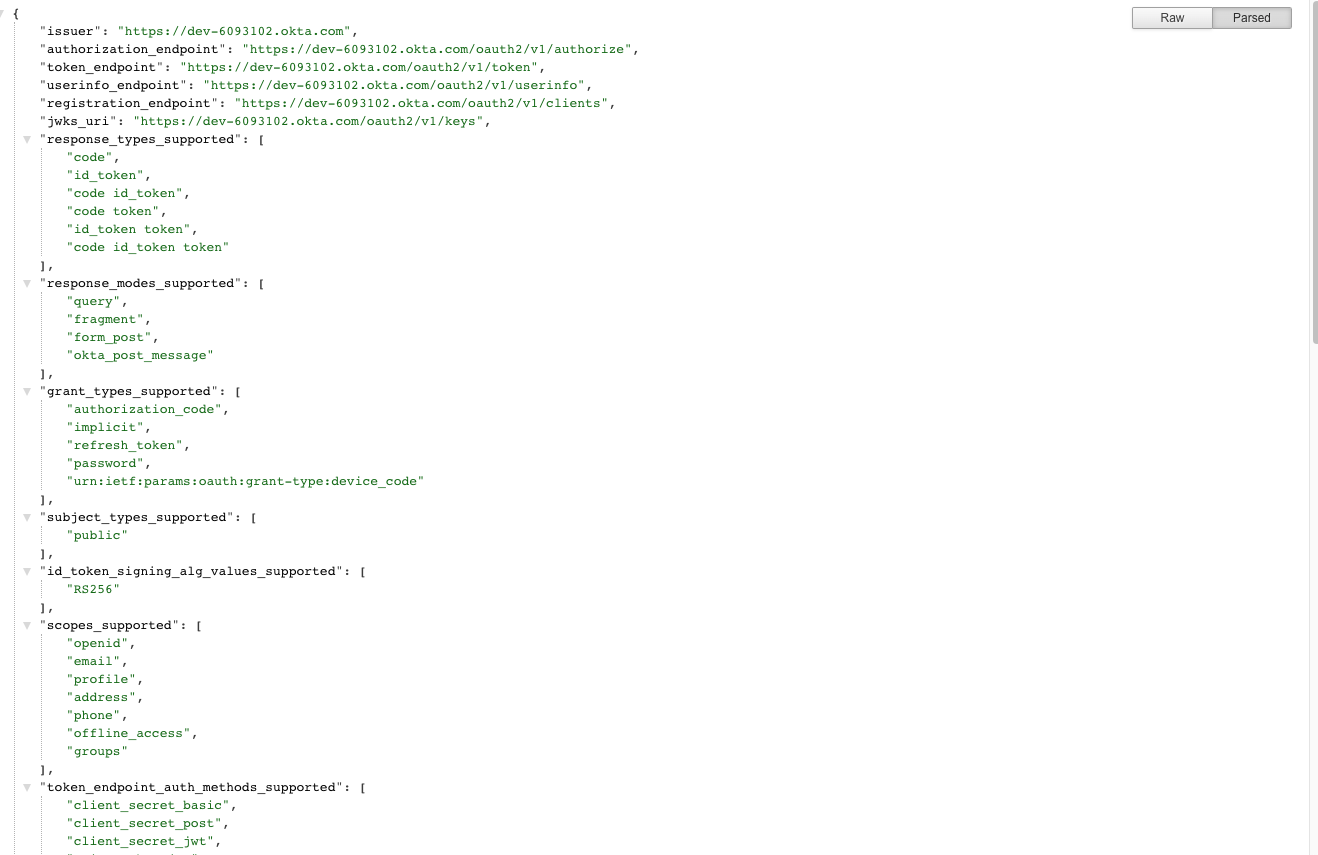
Finally, browse to https://{YOUR_TENANT}.okta.com/.well-known/openid-configuration, and copy the values of issuer and authorization_endpoint.
You'll need them to configure Okteto.
Update your Users Profile for Okteto
Okta will send the values set on the user profile as part of the authentication process. If you want to set specific values for Okteto, you can set an Application-specific override by going to Directory → People → ${User} → Applications → Okteto → Edit).

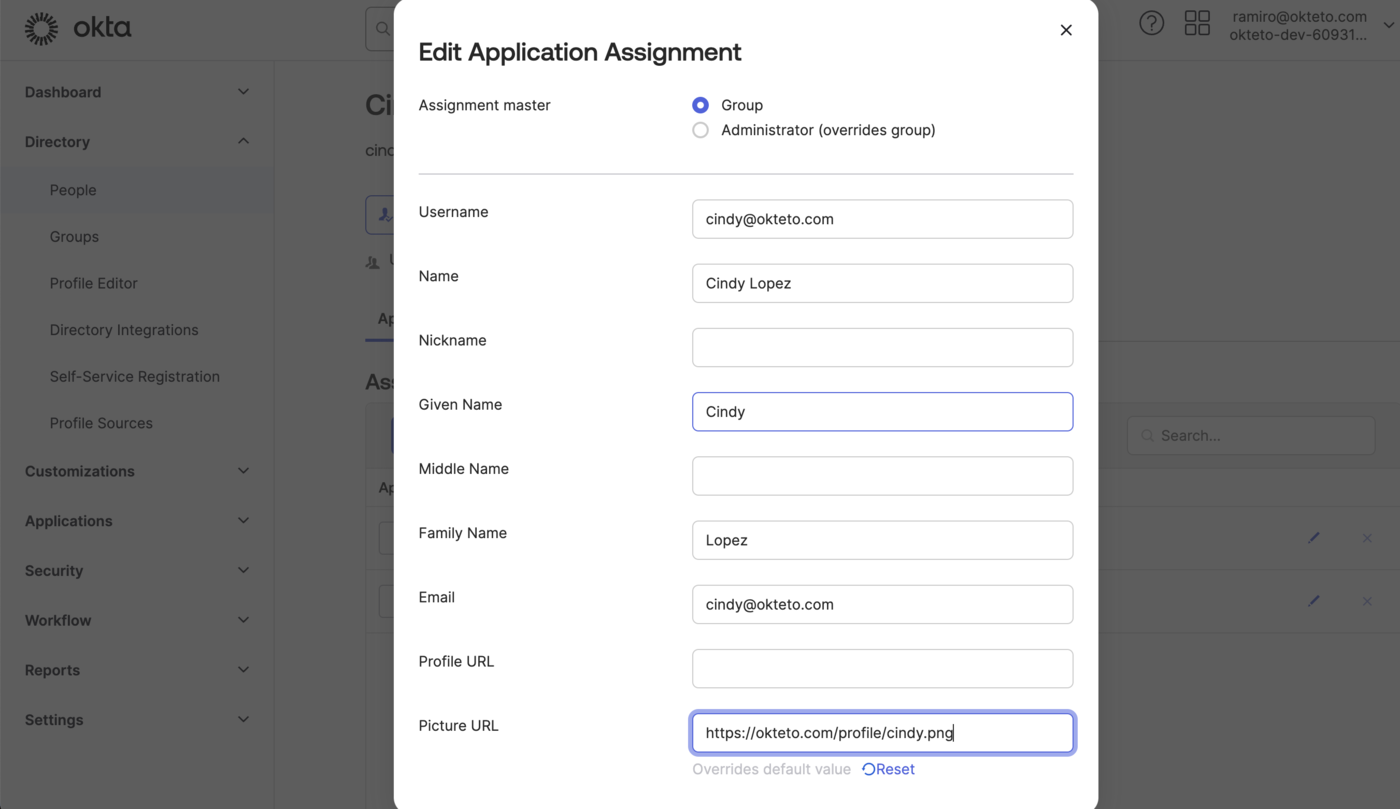
If you want to sync the profile picture from Okta, you'll need to set the Picture URL property in the dialog shown above.
Configure Okteto
Once you have the Okta application ready, , update the auth section of your Okteto Helm configuration file with the values you obtained on the first step of this guide:
auth:
  openid:
    enabled: true
    clientId: $CLIENT_ID
    clientSecret: $CLIENT_SECRET
    endpoints:
      issuer: $ISSUER_URL
      authorization: $AUTHORIZATION_URL
    mapping:
      externalIDKey: email
You can read more about mapping here.
In our sample instance, this looks like:
auth:
  openid:
    enabled: true
    clientId: 0oa76rh0z5zgKG7XXXXX
    clientSecret: dTgsfHbYV9tt91Ng4dzvpULw6y7kjJaYxzfXXXXX
    endpoints:
      issuer: https://dev-6093102.okta.com
      authorization: https://dev-6093102.okta.com/oauth2/v1/authorize
    mapping:
      externalIDKey: email
You can also store the value of clientSecret as a secret directly in Kubernetes.
Upgrade your Okteto instance for the new configuration to be applied. We recommend that you upgrade to the same version that you already have to minimize the changes and help you troubleshoot any issues.
Once the upgrade has been completed, go to your instance and click on the 'Log In' button to access your instance using Okta as the authentication provider.

Customize the attributes that Okteto consumes
By default, Okteto will use the following attributes below when creating a user:
Nameas the display name of the user.Nicknameas the username of the user.Emailas the email. Addresses must contain only lowercase alphanumeric characters, '-', or '.'Picture URLfor the user's profile picture.
If you are not using some of those values, or you want to customize which attributes get mapped, you can customize that by using the mapping field inside the openid key in your Helm configuration file.
auth:
  openid:
    enabled: true
    clientId: $CLIENT_ID
    clientSecret: $CLIENT_SECRET
    endpoints:
      issuer: $ISSUER_URL
      authorization: $AUTHORIZATION_URL
    mapping:
      externalIDKey: nickname
      nameKey: name
      emailKey: email
      pictureKey: picture
The value of every key in the mapping section must match a claim in your Okta + OpenID configuration, and it must contain a non-empty value.
For example, if you just want to use the email instead of the nickname for usernames, use the following configuration:
auth:
  openid:
    enabled: true
    clientId: 0oa76rh0z5zgKG7XXXXX
    clientSecret: dTgsfHbYV9tt91Ng4dzvpULw6y7kjJaYxzfXXXXX
    endpoints:
      issuer: https://dev-6093102.okta.com
      authorization: https://dev-6093102.okta.com/oauth2/v1/authorize
     mapping:
      externalIDKey: email
Configure Automatic User Deprovisioning
Follow this guide to set up the Okta event hook for user deprovisioning.
Troubleshooting
Log in fails with a 500 error
This is most likely because the user was not added to the application. Make sure that the user (or group) is assigned to the application that you just created in Okta.
To fix this, go to Application → Okteto → Assignments and add the required users or groups.