Admin Dashboard ScaleEnterpriseSelf-Hosted
The Admin Dashboard provides a web UI to see various details of your Okteto instance in a centralized location and offers features for managing parts of the Okteto experience for your users.
Accessing the dashboard
You can access the Admin Dashboard by clicking Admin in the left sidebar. Only accounts with the administrator role will be able to access the Admin Dashboard. The first user signing into your Okteto instance will automatically become the initial administrator.
You can promote other accounts to the administrator role in the Users section of the Admin Dashboard or by adding the dev.okteto.com/super: "true" label to the corresponding serviceAccount in Kubernetes.
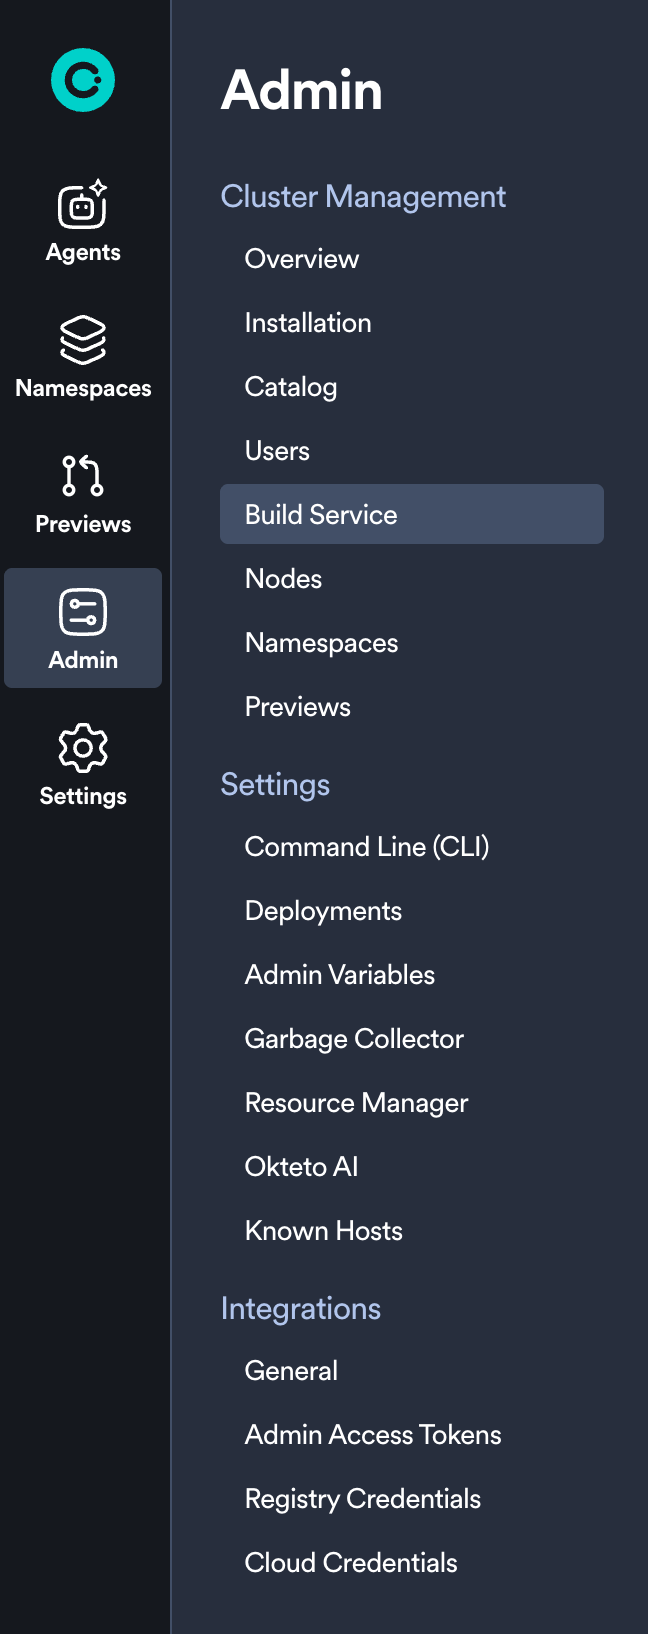
The Admin Dashboard consists of the following views:
Cluster Management
Settings
- Command Line (CLI)
- Deployments
- SSH Known Hosts
- Admin Variables
- Garbage Collector
- Resource Manager
- Okteto AI
Integrations
We will cover these in more detail below.
Overview
The overview section of the Admin Dashboard is designed to give you a high level view of your Okteto instance. This section currently shows you the following information:
- Your current pricing plan and license expiration date
- Number of available seats
- Okteto Helm chart version
- Okteto CLI version
- Kubernetes version
- Number of nodes in your cluster
- Number of Namespaces in your Okteto instance
- Number of Preview Environments currently active
The Okteto Helm chart version is also available to all users from the Help menu in the main navigation. This is useful when reporting issues or verifying your installation without Admin access.
Installation
Okteto is a flexible platform that streamlines your developer operations to make developers faster and more efficient. The initial installation has a few steps and we've built a guided experience to help get you setup even faster than before.
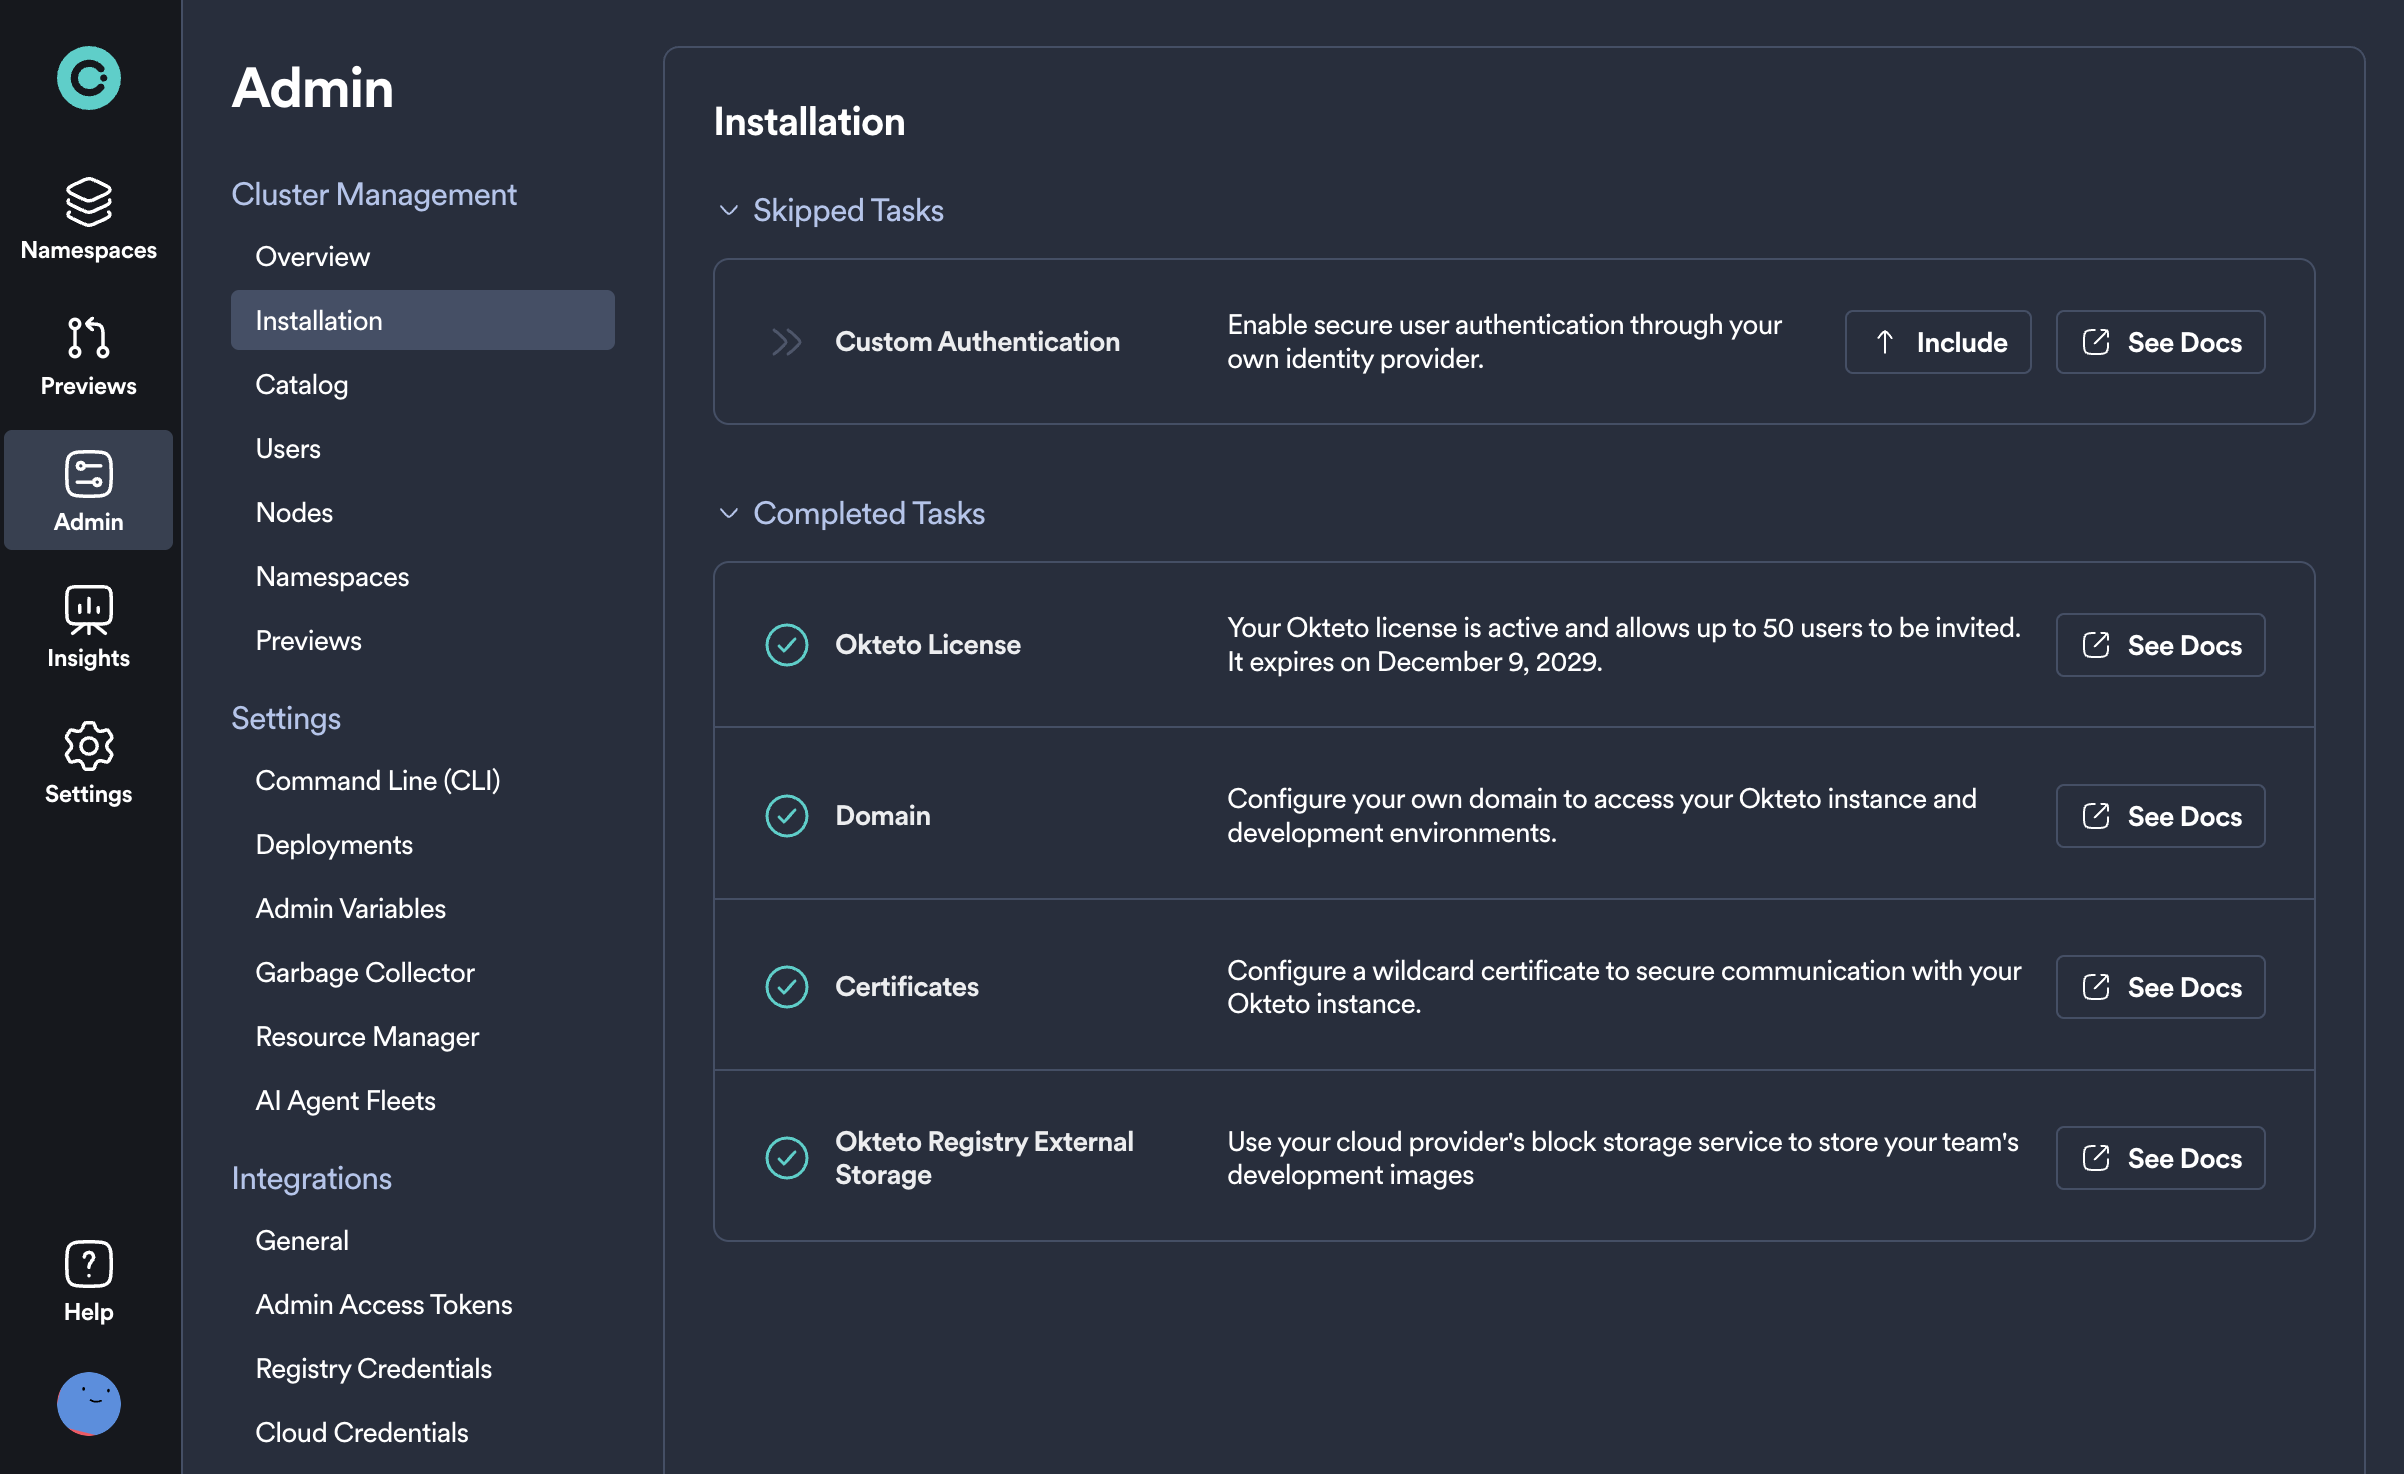
From this page you can follow a simple step-by-step guide to get the major components setup and have your Okteto installation ready to go in minutes. Each of these tasks comes with documentation to help guide you and are also skippable in case they don't apply to you or you simply wish to complete them later.
Catalog
This section of the Admin dashboard allows you to build a library of ready-to-use development environments for your team. By setting up these environments in advance, developers can quickly deploy them from the Deploy Dev Environment UI, significantly speeding up their setup process and reducing the need for initial configuration.

Please see our Catalog documentation to learn more about creating and deploying from an Okteto Catalog.
Users
From this section you can manage all users in your Okteto instance. This is a list of all users that have created an account in your Okteto instance, their respective roles, and with appropriate actions to manage their membership.
The User column is also the user's default namespace name/id. For example, a User value of "darryl" means that that user's namespace will also be called "darryl". Any additional namespaces created by "darryl" will show up only in the Namespaces tab.
On this page an administrator will be able to:
- View the total number of users on the Okteto instance (The
Totalvalue in the top right of the table) - View each user's name, email, and avatar
- View when a user was
Last Seen(any user who recently sent any API request to Okteto, e.g. from the browser, CLI, GitHub actions) - Change each user's role (Select
DeveloperorAdminfrom the dropdown menu in theRolecolumn) - Remove users (Click Remove from the overflow menu on the far right)
Removing the user will automatically remove all the namespaces owned by the deleted user.
Build Service
The Build Service section provides real-time Okteto Build infrastructure performance metrics. From this dashboard, you can view comprehensive monitoring of your BuildKit infrastructure, configure resource thresholds, and ensure optimal build performance across your Okteto instance.
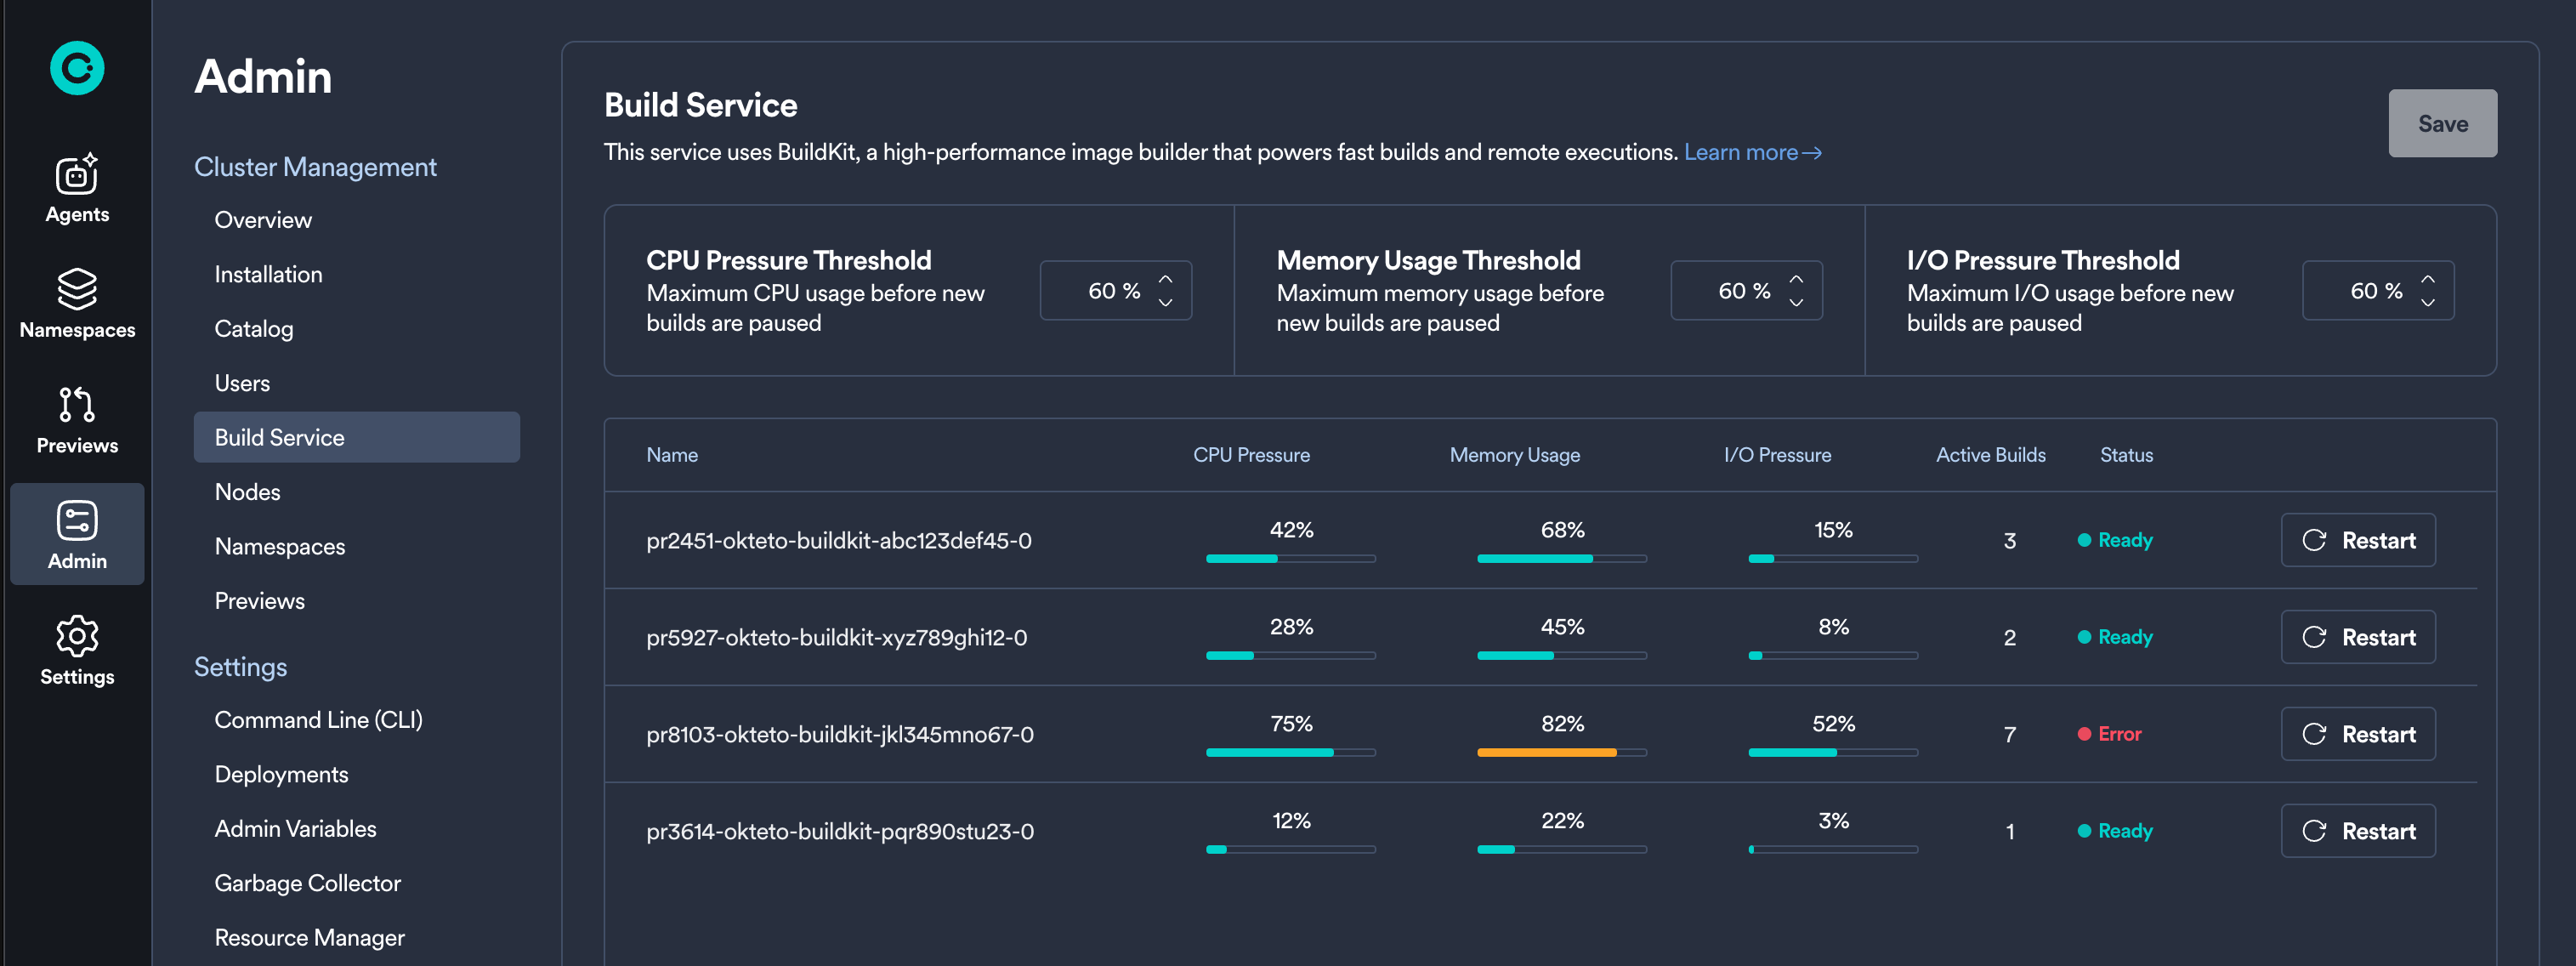
From this section, administrators can:
- Configure Resource Thresholds: Set thresholds that determine when a BuildKit pod is considered "Ready" to accept new build requests:
- CPU Pressure Threshold (default: 50%)
- Memory Pressure Threshold (default: 70%)
- IOPS Pressure Threshold (default: 30%)
- Monitor BuildKit Performance: View real-time metrics for each BuildKit pod including CPU pressure, memory usage, IOPS, and active builds
- View Pod Status: See the current status of each BuildKit pod (Ready, Busy, Starting, Stopping, Error)
The Build Service uses these thresholds to route build requests through the build queue system, ensuring consistent performance and fair resource distribution across your development teams.
For detailed information about configuring and optimizing the Build Service, see the Build Service Management Guide →
Nodes
In this section of the Admin Dashboard, you can find the following system information about your Kubernetes cluster, separated by node:
- Number of running pods
- Number of volumes in use
- Memory utilization
- CPU utilization
Namespaces
This view enables you to manage all of the Namespaces within your Okteto instance, including the ability to view (masquerade as the user), wake, or persist any Namespace. The top of the Namespace table also shows you the default settings for the garbage collection configuration.
For each Namespace, an administrator can:
- View the name, owner, status (
activeorsleeping), and when it was last active - Get read-only access to any Namespace managed by Okteto by clicking the Namespace name
- Manually wake the Namespace (using the Wake Up option)
- Mark the Namespace as
persistentusing thePersistentoption to prevent it from sleeping, being deleted, and exempt it from the garbage collection process - Transfer a Namespace to a new owner
- View the "Last Seen" time referring to the most recent activity detected within the Namespace, such as deploying resources or running okteto up.
Previews
Similar to the Namespaces section, the Previews section shows you a list of all Preview Environments that exist in your Okteto instance.
From this page, an administrator can configure and manage any of the listed Preview Environments, including filtering, searching, and performing actions like wake, sleep, and delete.
See the full Preview Environments management guide →
Command Line (CLI)
The Command Line section allows you to manage how developers interact with Okteto via their CLI. Here, you can enable remote execution by default and configure the minimum accepted CLI version that developers can use.
As an Okteto Admin, you can now enforce a minimum accepted CLI version for your developers. This feature ensures compatibility, encourages feature adoption, and maintains a consistent experience across your team.
How Enforcing a Minimum Accepted CLI Version Works
Admin Configuration
- Set the minimum accepted CLI version through the Okteto Admin Dashboard. Let's say the installed CLI version on the cluster is 3.2.0, the options are:
- Any Version: No restriction, developers can use any CLI version
- Current Version: Restricts developers to use same CLI version installed on cluster or newer, i.e. >= v3.2
- Previous Version: Restrict developers to at least the prior minor version, i.e. >= 3.1
- Two Previous Versions: Restrict developers to at least two prior minor versions, i.e. >= 3.0
CLI Version Enforcement
- Commands fail if a developer uses a CLI version older than the minimum setting, displaying an error prompting them to update their CLI.
Version enforcement only applies to those using Okteto CLI 3.2.0 and above.
Deployments
The Deployments section of the Admin Dashboard allows administrators to configure default behavior when redeploying or destroying resources with declared dependencies.
From this panel, you can enable the following options:
- Redeploy Including Dependencies: When enabled, redeploying a resource will also automatically redeploy its direct dependencies by default
- Destroy Including Dependencies: When enabled, destroying a resource will also destroy its direct dependencies by default
These settings help ensure more predictable and consistent behavior when working with multi-service development environments.
SSH Known Hosts
Use SSH Known Hosts to centrally manage trusted host keys for SSH-based Git operations (including submodules) across your organization. This improves security and avoids host verification prompts for remote deploys.
Learn how to configure SSH Known Hosts →
Admin Variables
The Admin Variables section of the Admin dashboard lets you define cluster-wide variables. You can refer to these variables directly in your Okteto manifest using the $SOME_VAR syntax. They are also injected into the environment running the commands in the deploy section of the manifest.
Variables defined by the user take precedence over variables and build secrets defined through the manifest.
We recommend using build secrets to inject sensitive data into your Dockerfile.
The example below shows how to configure your Okteto manifest to mount a local .env file into your Dockerfile:
build:
  api:
    context: .
    secrets:
      my_env: .env
You can refer to this secret from your Dockerfile using the syntax below:
RUN --mount=type=secret,id=my_env,target=/etc/secrets/.env cat /etc/secrets/.env
The content of the .env file would be:
${MY_PASSWORD}
where MY_PASSWORD can be a local environment variable or an Okteto Secret, and it gets substituted by Okteto before mounting the file as a build secret.
Garbage Collector
Configure sleep and delete periods for Okteto Namespaces and Preview Environments from the UI.
Resource Manager
Automatically optimize the CPU and memory requests for your environments. By analyzing real-time resource utilization, the Resource Manager dynamically adjusts resource requests to ensure efficient usage, prevent node overload, and improve overall cluster performance. This feature simplifies resource management, reduces manual adjustments, and enhances application stability, especially in larger clusters.
Okteto AI
The Okteto AI section allows you to enable and configure AI-powered development agents for your organization. These agents, powered by Claude Code from Anthropic, can help developers scale AI-powered workflows by running agents in fully isolated, production-like development environments without local setup or risk.
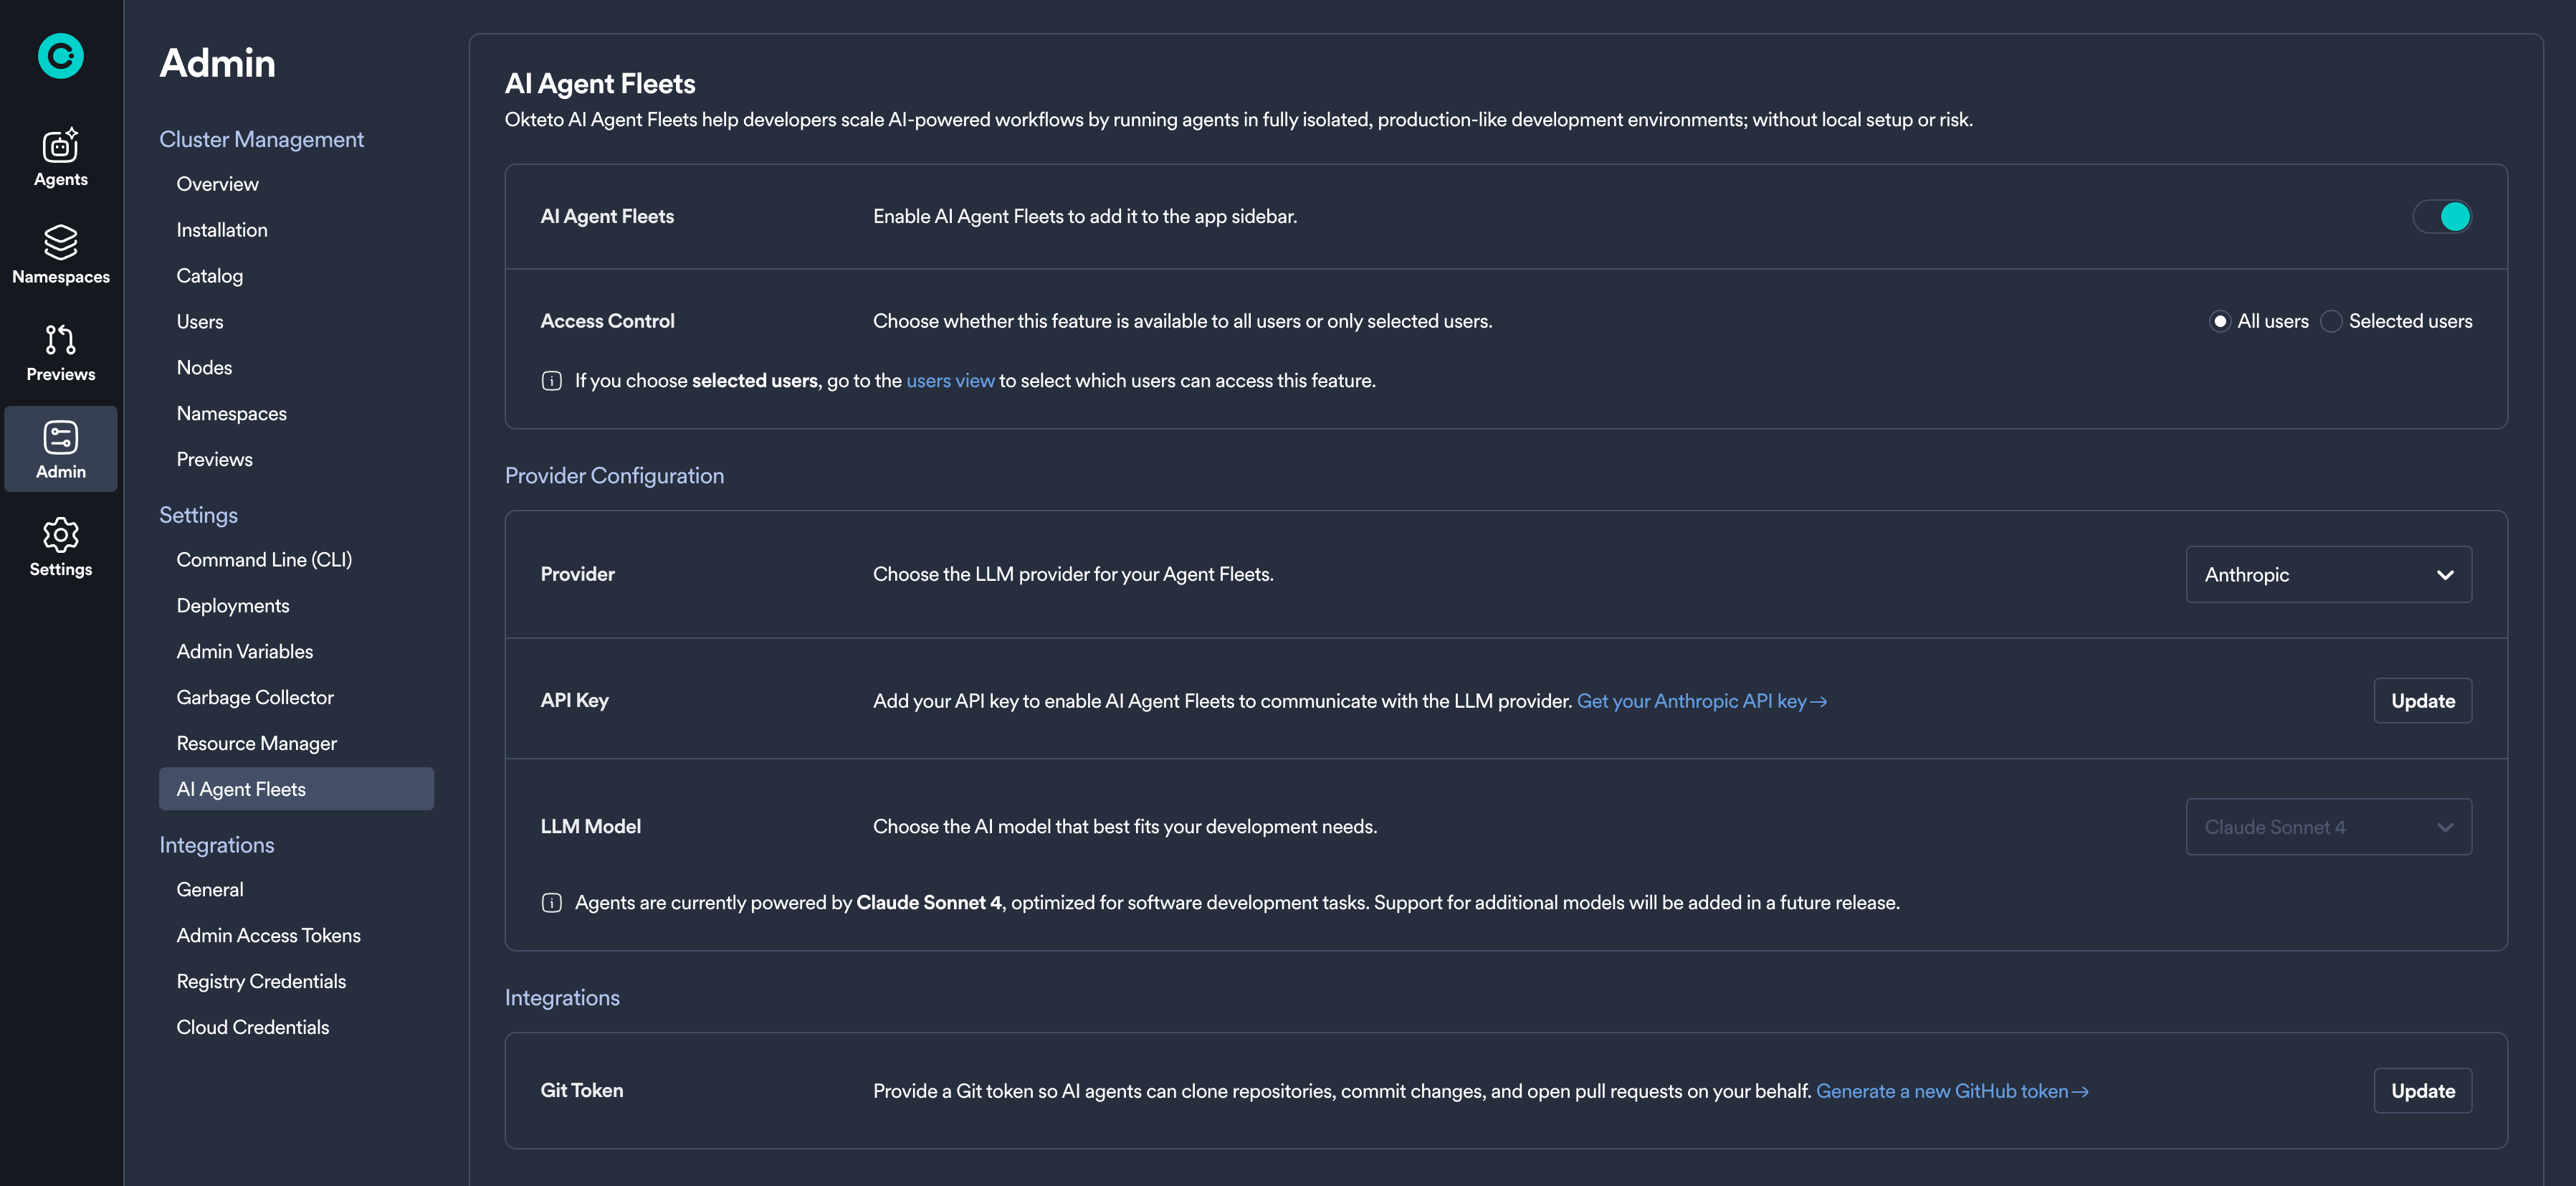
From this section, administrators can:
- Enable Okteto AI: Toggle the feature on or off for your organization
- Configure Access Control: Choose between enabling for all users or selected users only
- Select LLM Provider: Configure either Anthropic (direct) or Amazon Bedrock as your provider
- Set up Git Integration: Configure Git tokens to enable agents to have access to the repositories that you wish
The currently supported LLM model is Claude Sonnet 4.6, optimized for software development tasks. Support for additional models will be added in future releases.
For detailed configuration instructions, see the Okteto AI Administrator Configuration Guide →
General Integrations
This section allows you to configure Okteto integrations with other tools.
The following options available are:
- Configuring your Git SSH key
- Getting your Okteto Insights token
- Configuring OpenID Connect (OIDC)
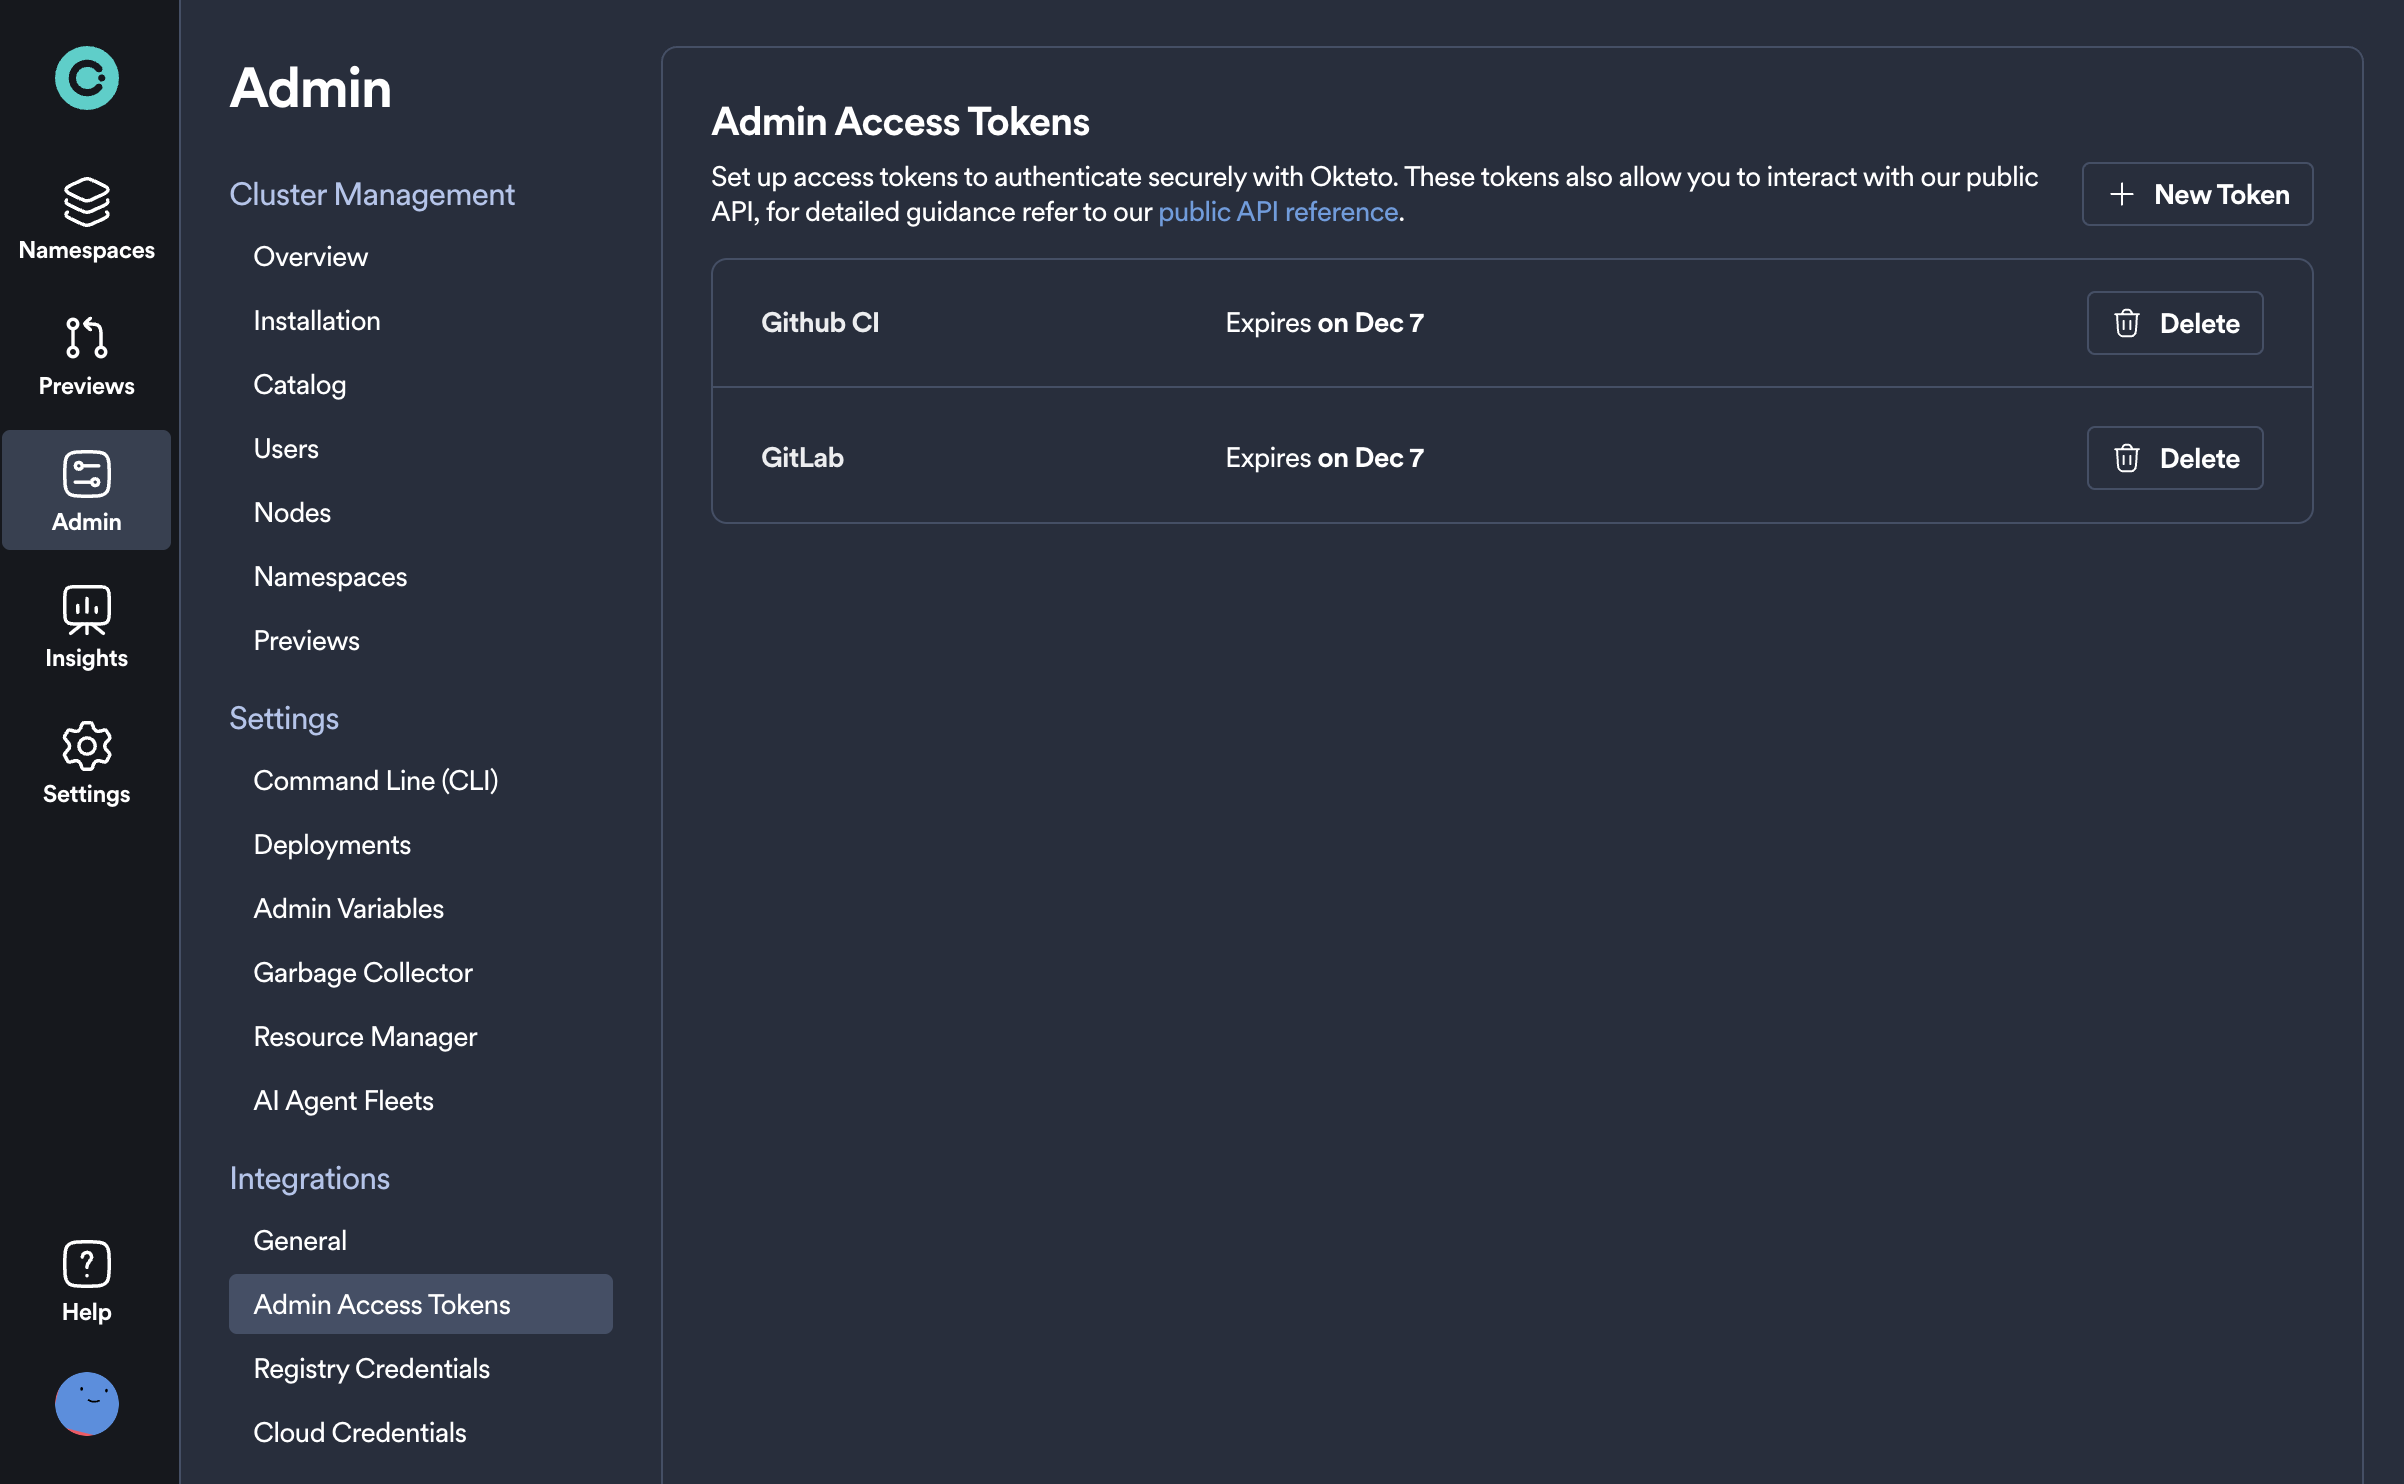
Admin Access Tokens
You can use Admin Access Tokens instead of OAuth to authenticate with Okteto.
Admin Access Tokens are created and work in the same manner as Personal Access Tokens, with the difference that they have admin permissions. They are intended to be used over personal access tokens for shared automations, e.g. Preview Environments.
Automations run with Admin Access tokens are performed by the okteto-bot user.
It is important that you set the scope to global for Preview Environments created with the okteto-bot user so that users other than okteto-bot can view the environment.
Registry Credentials
If you choose to pull images from a private registry in addition to Okteto's Container Registry, you can configure credentials for that service here.
Cloud Credentials
Dynamically configure Okteto's connection to AWS and GCP, eliminating the need for developers to manage static credentials.
Review this page for a full description of how to configure and start using Cloud Credentials →