How to Create a Development Environment with Realistic Data in Okteto

Data cloning is the process of creating an independent identical copy of an application's database. Data clones come in handy during the development stage of an application's lifecycle as they can be used to test an application's behavior during development.
The traditional process of creating data clones manually slows down your development workflow. Using a cloud native approach with Okteto, you can automatically create a development environment with realistic data by simply appending a few annotations to your application's manifest.
In this blog post, you'll deploy an application to Okteto, learn how to create a data clone of the application's database, and then learn how to use it when creating a new development environment.
Prerequisite
In order to follow this tutorial, you should have:
- A Kubernetes cluster with Okteto installed
- Knowledge of Kubernetes manifests
- kubectl installed on your machine
Step 1: Deploy the sample application
For this post, you'll be deploying a CRUD recipe application. Run the command from your terminal to clone the repository:
$ git clone https://github.com/okteto/fastapi-snapshot-app
$ cd fastapi-snapshot-app
In the manifests folder, the k8s.yml manifest file is responsible for the deployment of the application's service, and the mongo.yml manifest file is responsible for deploying the database service. The database service in this case is a MongoDB service.
Deploy your application from your terminal:
$ okteto kubeconfig
$ kubectl apply -f manifests/
deployment.apps/fastapi-snapshot-demo created
service/fastapi-snapshot-demo created
persistentvolumeclaim/data created
service/mongodb created
statefulset.apps/mongodb created
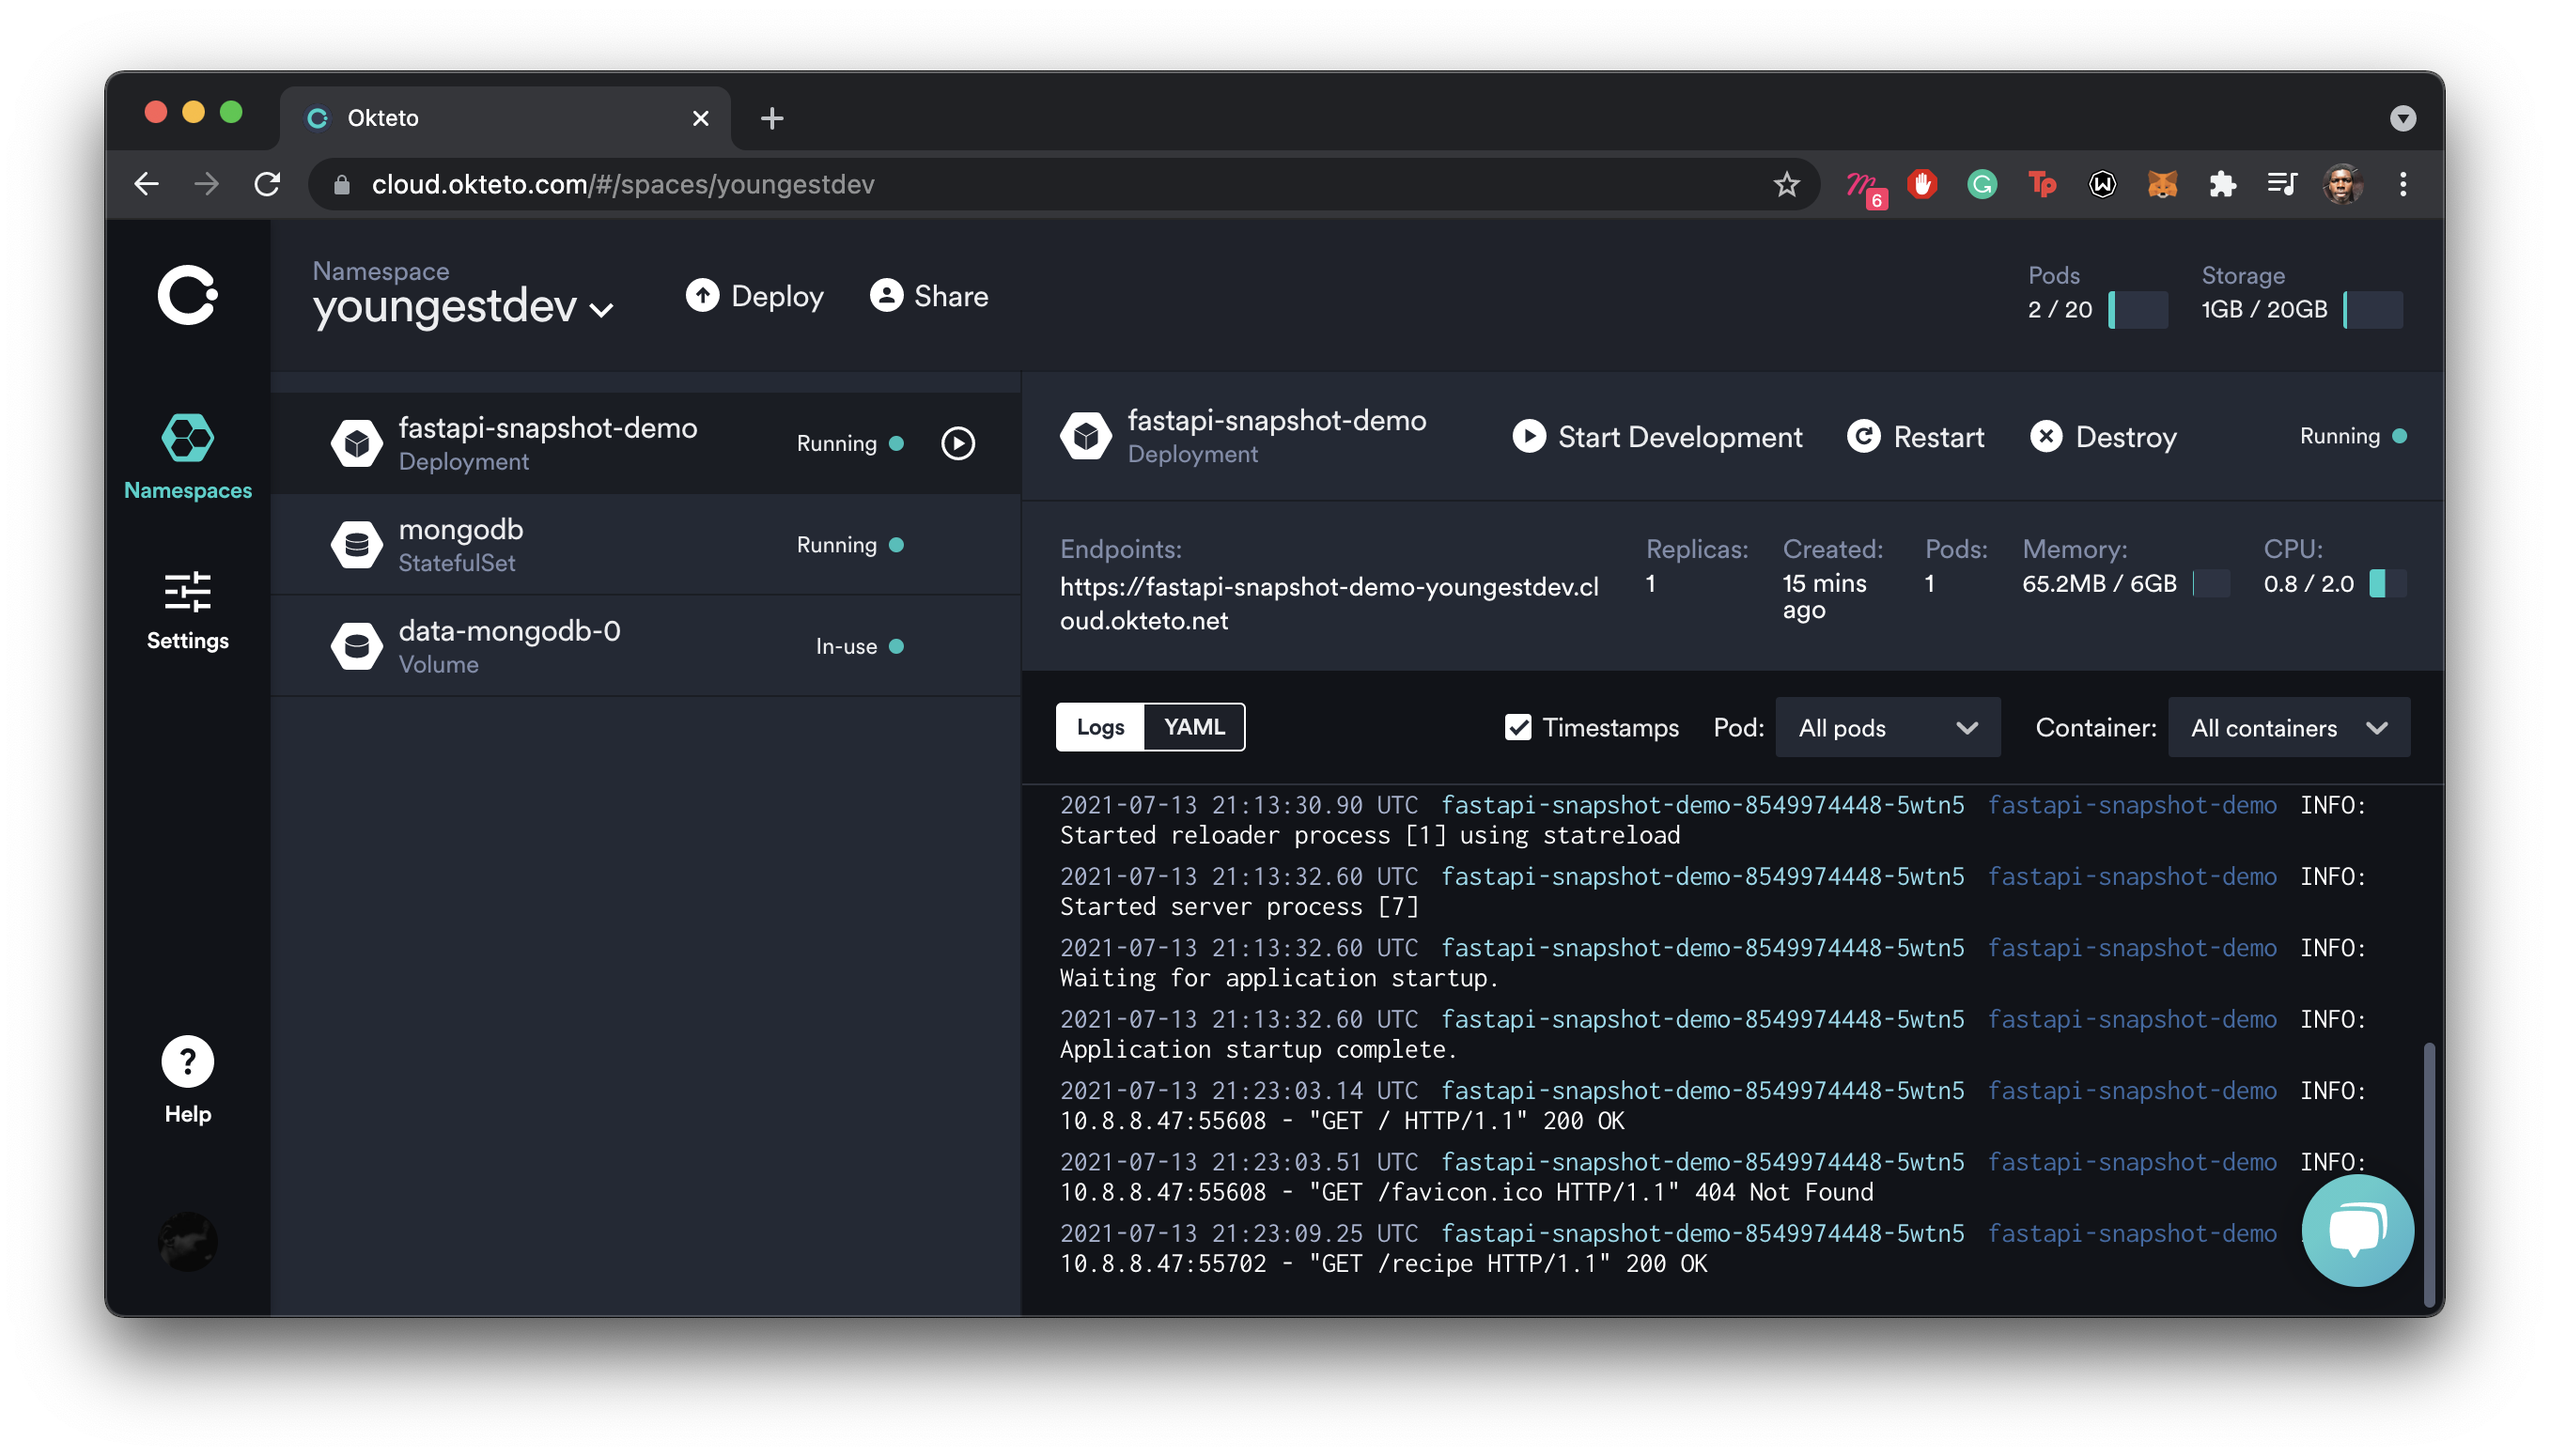
Take note of your endpoint URL located under Endpoints.
Step 2: Populate the application database
The next step is to add a few recipes into the database. This is the data that we'll be including in the development environments we'll create in the next steps.
From your terminal, run the commands:
$ curl -X 'POST' \
  'https://fastapi-snapshot-demo-yournamespace.cloud.okteto.net/recipe' \
  -H 'accept: application/json' \
  -H 'Content-Type: application/json' \
  -d '{
  "name": "Donuts",
  "ingredients": [
    "Flour",
    "Milk",
    "Sugar",
    "Vegetable Oil"
  ]
}'
$ curl -X 'POST' \
  'https://fastapi-snapshot-demo-yournamespace.cloud.okteto.net/recipe' \
  -H 'accept: application/json' \
  -H 'Content-Type: application/json' \
  -d '{
  "name": "Pancake",
  "ingredients": [
    "Flour",
    "Milk",
    "Sugar",
    "Baking Powder",
    "Vegetable Oil"
  ]
}'
Verify that the database has been populated by retrieving the list of recipes present:
$ curl -X 'GET' \
  'https://fastapi-snapshot-demo-yournamespace.cloud.okteto.net/recipe' \
  -H 'accept: application/json'
Response:
{
  "data": [
    {
      "id": "60ce68651eeddf1c5ab796d1",
      "name": "Donuts",
      "ingredients": [
        "Flour",
        "Milk",
        "Sugar",
        "Vegetable Oil"
      ]
    },
    {
      "id": "60ce689c1eeddf1c5ab796d2",
      "name": "Pancake",
      "ingredients": [
        "Flour",
        "Milk",
        "Sugar",
        "Baking Powder",
        "Vegetable Oil"
      ]
    }
  ]
}
Step 3: Create a database snapshot
A volume snapshot will be used to create the database clone for your application. Create a new manifest file snapshot.yml and add the following to it:
apiVersion: snapshot.storage.k8s.io/v1beta1
kind: VolumeSnapshot
metadata:
  name: mongo-snapshot
spec:
  volumeSnapshotClassName: okteto-snapshot-class
  source:
    persistentVolumeClaimName: data-mongodb-0
In the volume snapshot manifest above, you are creating a volume snapshot named mongo-snapshot, the snapshot will be created from the persistent volume data-mongodb-0 which was created by the MongoDB manifest.
The volume snapshot name
okteto-snapshot-classis specific to Okteto Cloud. For enterprise users, follow the procedures in the docs to enable this feature.
Next, create the volume snapshot from your terminal:
$ kubectl apply -f manifests/vol.yml
Finally, verify that the volume snapshot has been created successfully.
$ kubectl get volumesnapshot
volumesnapshot.snapshot.storage.k8s.io/mongo-snapshot created
Step 4: Deploying your development environment with data
The first step is to create a new namespace to house our development environment:
$ okteto namespace create data-clone-$YOUR_OKTETO_USERNAME
The next step is to update the application's manifest to tell Okteto where to get the data from. To do this, create a new folder in the parent directory and copy k8s.yml and mongo.yml into it:
$ mkdir data-clone-manifest
$ cp manifests/{k8s.yml,mongo.yml} data-clone-manifest
Next, edit the content of the mongo.yml manifest:
Update the volumeClaimTemplates section in the manifest:
apiVersion: apps/v1
kind: StatefulSet
metadata:
  name: mongodb
spec:
  ...
  volumeClaimTemplates:
    - metadata:
        name: data
        annotations:
          dev.okteto.com/from-snapshot-name: mongo-snapshot
          dev.okteto.com/from-snapshot-namespace: $YOUR_DATA_NAMESPACE
      spec:
        accessModes: [ "ReadWriteOnce" ]
        resources:
          requests:
            storage: 1Gi
---
Replace $YOUR_DATA_NAMESPACE with the name of the namespace you created the volume snapshot in.
In the updated manifest above, you have removed the section that creates a persistent volume for the MongoDB service and added a subsection under the Statefulset's spec.
In the volumeClaimTemplates subsection, annotations have been added to instruct Okteto to create the data source for the stateful set from the snapshot created earlier mongo-snapshot in the namespace.
Next, deploy your application using the newly created manifests:
$ kubectl apply -f data-clone-manifest
deployment.apps/fastapi-snapshot-demo created
service/fastapi-snapshot-demo created
service/mongodb created
statefulset.apps/mongodb created
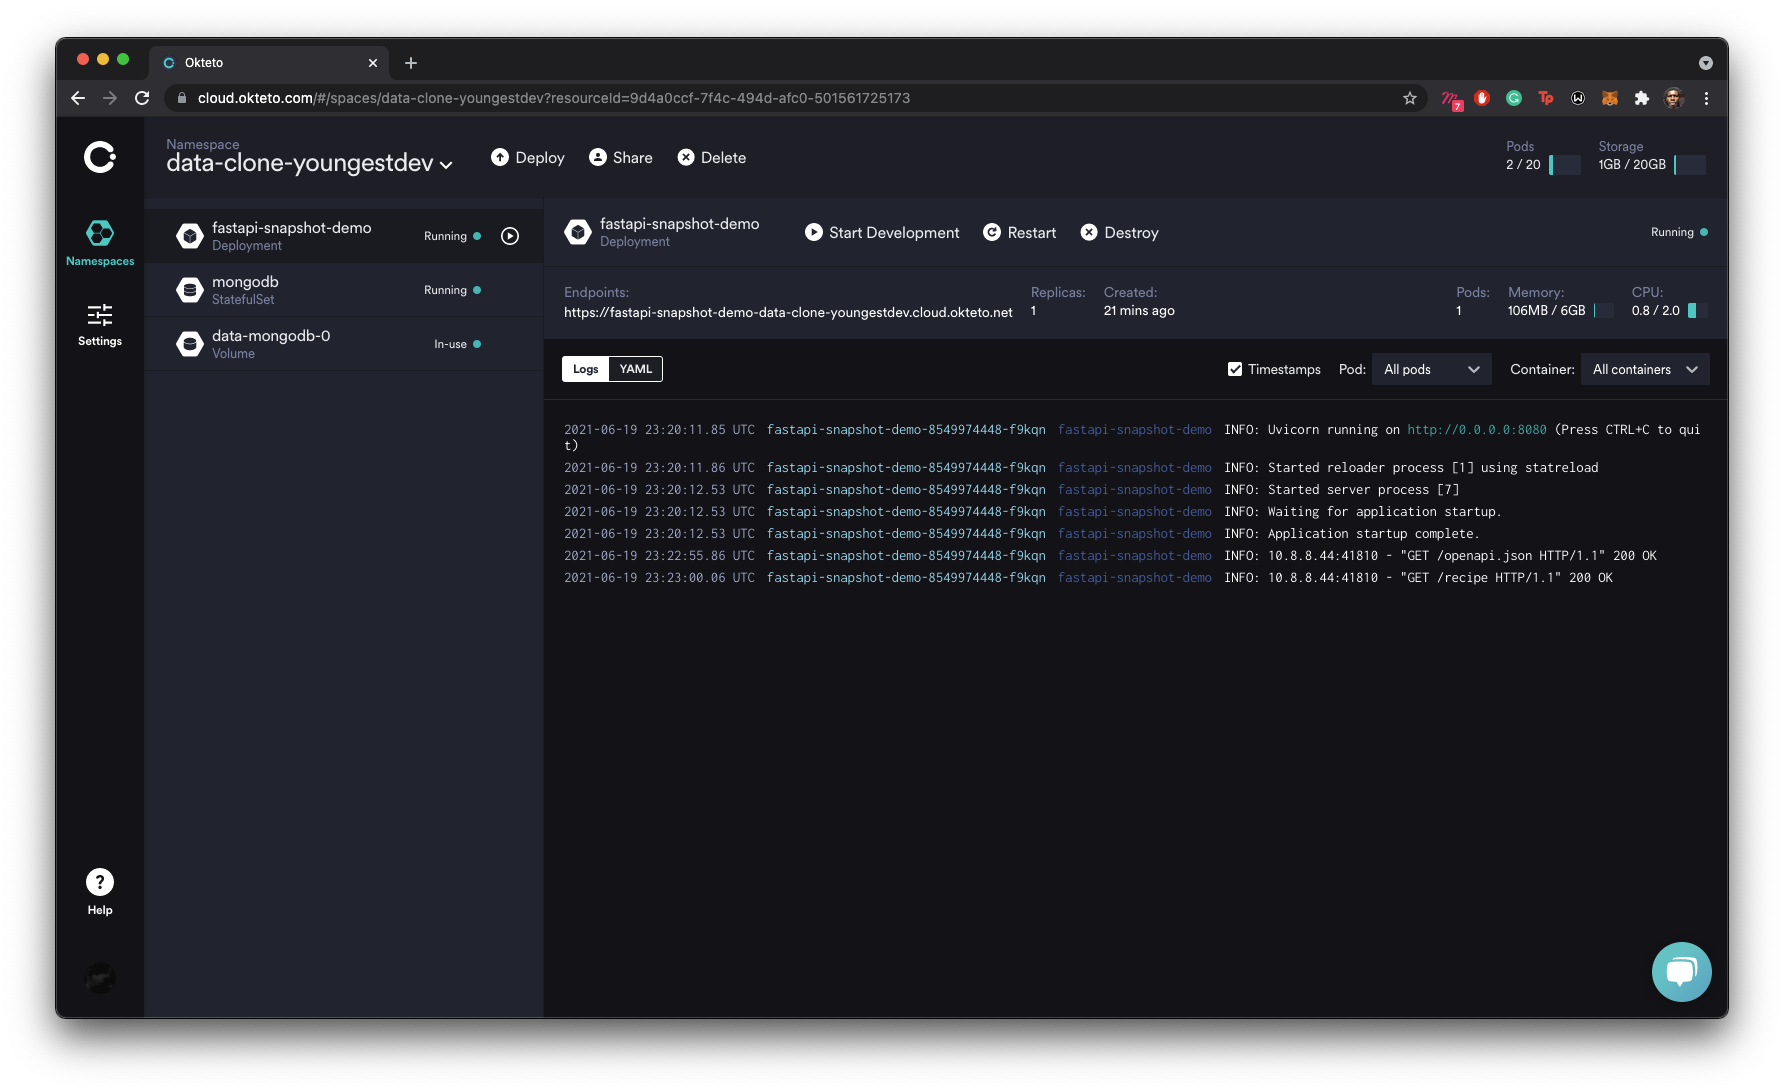
The application has been redeployed and the endpoint can be accessed from the UI:
Step 5: Verify that our data is there
The final step is to retrieve the list of recipes from the newly deployed application. This is to verify that the development environment was created with the expected data.
From your terminal, run the command:
$ curl -X 'GET' \
  'https://fastapi-snapshot-demo-data-clone-yournamespace.cloud.okteto.net/recipe' \
  -H 'accept: application/json'
Response:
{
  "data": [
    {
      "id": "60ce68651eeddf1c5ab796d1",
      "name": "Donuts",
      "ingredients": [
        "Flour",
        "Milk",
        "Sugar",
        "Vegetable Oil"
      ]
    },
    {
      "id": "60ce689c1eeddf1c5ab796d2",
      "name": "Pancake",
      "ingredients": [
        "Flour",
        "Milk",
        "Sugar",
        "Baking Powder",
        "Vegetable Oil"
      ]
    }
  ]
}
From the response above, the data cloning process was successful.
Conclusion
In this article, you learned how to deploy a development environment with data include on Okteto. Instead of having to copy or use a database deployed in production during development, a clone can be easily used to avoid errors and save time.
By using the kubectl command, you're able to deploy your application to Okteto from your local machine without having to configure anything.
By using okteto namespace create command, you're able to create a new namespace on your Okteto account without leaving your terminal.
The code used for this article can be found on GitHub. In this tutorial, we are using Kubernetes manifests, but this feature also works with docker-compose and okteto stacks. Check our documentation to learn more about it!


 Arsh Sharma