A Step-by-step Guide on Deploying Your Docker Compose Application to Okteto

Naturally, applications deployed to Kubernetes are containerized and mostly built as docker images. A docker-compose manifest is a configuration manifest file for listing and configuring single or multiple application services to be deployed. Like Kubernetes manifests or Helm charts, docker-compose is now supported as a manifest for application deployment on Okteto.
In this tutorial, you'll learn how to build an API with Golang, and deploy it to Okteto Cloud by using a docker compose manifest.
You'll start by writing the code for the application, after which you'll define a Docker Compose manifest file for the application deployment, and finally deploy it to Okteto Cloud.
Docker Compose on Okteto
The new docker-compose integration was built to allow developers to deploy applications using the manifest of their choice without having to move existing configurations to K8s manifests or Helm charts. As a result, you can import your existing repositories in the Okteto Cloud UI and deploy with one click, use the Okteto CLI to deploy a docker compose application, and spin up a new application by either writing or pasting a docker compose configuration in the docker compose panel on the Okteto Cloud UI.
These amazing features will be demonstrated on our first community call happening on the 27th of May, make sure to register and attend.
Prerequisites
In order to follow this tutorial, the following prerequisites must be met:
- The latest version of Go installed on your machine
- Good knowledge of the Go programming language and Docker
- Docker compose installed.
- Okteto CLI installed.
If you don't have the latest version of Go installed, refer to the official guide on how to install it. Likewise, refer to the official guide on how to install Docker Compose locally.
Initial Setup
Start by creating a new folder for your project called myfood-app:
$ mkdir myfood-app
$ cd myfood-app
In your newly created folder, initialize your go module, and create a new file:
$ go mod init
$ touch main.go
In this tutorial, you'll be building a simple food API application. You'll be using the mux package for handling the routes' operation, the official MongoDB driver for handling database operations, and gin to automatically compile and reload our application after every change.
Go ahead and install the application dependencies:
$ go get github.com/gorilla/mux
$ go get github.com/codegangsta/gin
$ go get go.mongodb.org/mongo-driver/mongo
Dockerfile and Docker Compose Manifest
The Dockerfile contains build instructions for your application image, while the docker-compose manifest is responsible for building each service listed in it during the deployment process. Create a Dockerfile and add the following to it:
$ touch Dockerfile
Add the following to it:
from golang:buster as builder

WORKDIR /app
ADD . .
RUN go build -o /usr/local/bin/myfood-app

EXPOSE 8080
CMD ["/usr/local/bin/myfood-app"]
Create a docker-compose.yml to define and register the services for your application:
$ touch docker-compose.yml
Add the following to it:
version: "3"

services:
  web:
    build: .
    ports:
      - 8080:8080

  mongodb:
    image: bitnami/mongodb
    ports:
      - 27017
    volumes:
      - mongodb-data:/bitnami/mongodb

volumes:
  mongodb-data:
In the docker-compose.yml file, you have two services to be built and deployed. The first one, web, is the application you will be building in this article, and the mongodb service is the database for your application.
Routes
In the main.go file, declare the package name and import the dependencies for the application:
package main

import (
	"context"
	"encoding/json"
	"fmt"
	"github.com/gorilla/mux"
	"go.mongodb.org/mongo-driver/bson/primitive"
	"go.mongodb.org/mongo-driver/mongo"
	"go.mongodb.org/mongo-driver/mongo/options"
	"net/http"
	"time"
)
Next, create a new variable for the MongoDB client, and a model for the food data you'll be passing into the database from your API:
var client *mongo.Client

type Food struct {
    ID primitive.ObjectID    `json:"_id,omitempty" bson:"_id,omitempty"`
    Name  string             `json:"name,omitempty" bson:"name,omitempty"`
    Tribe string             `json:"tribe,omitempty" bson:"tribe,omitempty"`
}
In the model above, you defined the fields for each data passed. The ID filed is automatically filled each time an entry is added to the database while the Name and Tribe field is passed in the request body.
Next, define the entrypoint function, main(), where you will define instantiate routing, and the MongoDB instance:
func main() {
	fmt.Println("Starting the application on port 8080")
	ctx, _ := context.WithTimeout(context.Background(), 10*time.Second)
	clientOptions := options.Client().ApplyURI("mongodb://localhost:27017")
	client, _ = mongo.Connect(ctx, clientOptions)
	router := mux.NewRouter()
}
In the code block above:
- On line 1, you're printing a message to inform you when the application starts.
- On lines 2-4, you are defining a mongodb connection instance, the
clientvariable is responsible for your MongoDB connection. - On line 5, you defined a variable
router, an instance of themuxrouting package.
With the entrypoint function in place, define the route to add a new food entry.
The first step is to define the function:
func AddFood(response http.ResponseWriter, request *http.Request) {

}
The second step is to set the response header to application/json:
response.Header().Set("content-type", "application/json")
The third step is to create a variable food, and decode the request body into it.
var food Food
_ = json.NewDecoder(request.Body).Decode(&food)
The last step is to insert the food data into the foods collection in the foodrestapi database, and then return the output from the insert operation:
collection := client.Database("foodrestapi").Collection("foods")
ctx, _ := context.WithTimeout(context.Background(), 5*time.Second)
result, _ := collection.InsertOne(ctx, food)
json.NewEncoder(response).Encode(result)
In the main function, register the route for the AddFood controller, then instruct your application to listen on port 8080:
func main() {
	fmt.Println("Starting the application on port 8080")
	ctx, _ := context.WithTimeout(context.Background(), 10*time.Second)
	clientOptions := options.Client().ApplyURI("mongodb://localhost:27017")
	client, _ = mongo.Connect(ctx, clientOptions)
	router := mux.NewRouter()
	router.HandleFunc("/food", AddFood).Methods("POST")
	http.ListenAndServe(":8080", router)
}
Start your application with the command:
$ gin --appPort 8080 --all -i run main.go
Start the MongoDB instance with the command:
$ docker-compose up mongodb
Test the new route by sending a new POST request from your terminal:
$ curl --request POST \
  --url http://localhost:8080/food \
  --header 'Content-Type: application/json' \
  --data '{
	"Name": "Amala and Ewedu",
	"Tribe": "Yoruba, Western Nigeria"
}'
The command above returns an ID of the inserted data:
{
  "InsertedID": "6097f2c61e4caecc2c8e8898"
}
Next, add the routes for retrieving a single food and all the food data from the database:
Start by adding the bson module to the imports:
import (
    ...
    "go.mongodb.org/mongo-driver/bson"
)
Next, add the route handler functions:
func GetFood(response http.ResponseWriter, request *http.Request) {
	response.Header().Set("content-type", "application/json")
	params := mux.Vars(request)
	id, _ := primitive.ObjectIDFromHex(params["id"])
	var food Food
	collection := client.Database("myfood").Collection("foods")
	ctx, _ := context.WithTimeout(context.Background(), 30*time.Second)
	err := collection.FindOne(ctx, Food{ID: id}).Decode(&food)
	if err != nil {
		response.WriteHeader(http.StatusInternalServerError)
		response.Write([]byte(`{ "message": "` + err.Error() + `" }`))
		return
	}
	json.NewEncoder(response).Encode(food)
}

func GetFoods(response http.ResponseWriter, request *http.Request) {
	response.Header().Set("content-type", "application/json")
	var foods []Food
	collection := client.Database("myfood").Collection("foods")
	ctx, _ := context.WithTimeout(context.Background(), 30*time.Second)
	cursor, err := collection.Find(ctx, bson.M{})
	if err != nil {
		response.WriteHeader(http.StatusInternalServerError)
		response.Write([]byte(`{ "message": "` + err.Error() + `" }`))
		return
	}
	defer cursor.Close(ctx)
	for cursor.Next(ctx) {
		var food Food
		cursor.Decode(&food)
		foods = append(foods, food)
	}
	if err := cursor.Err(); err != nil {
		response.WriteHeader(http.StatusInternalServerError)
		response.Write([]byte(`{ "message": "` + err.Error() + `" }`))
		return
	}

	json.NewEncoder(response).Encode(foods)

}
Once again, register the routes in the main function:
func main(){
    ...
    router.HandleFunc("/food", GetFoods).Methods("GET")
    router.HandleFunc("/food/{id}", GetFood).Methods("GET")
    http.ListenAndServe(":8080", router)
}
Test the route to retrieve all the food data:
$ curl --request GET \
  --url http://localhost:8080/food \
  --header 'Content-Type: application/json'
For a single food:
$ curl --request GET \
  --url http://localhost:8080/food/6097f2c61e4caecc2c8e8898 \
  --header 'Content-Type: application/json'
With each route in place, you have successfully built a CRUD API in Go.
Deploying to Okteto Cloud
Before deploying, change the client configuration variable in the main function on line 3 to:
clientOptions := options.Client().ApplyURI("mongodb://mongodb:27017")
In the code block above, you changed the address of the mongodb server to the service name registered in the docker-compose file.
== Run the commands to login and verify that your Okteto namespace is active:
Start by creating an active Okteto session on your local machine with the command:
$ okteto context
Next, deploy your application:
$ okteto stack deploy --build
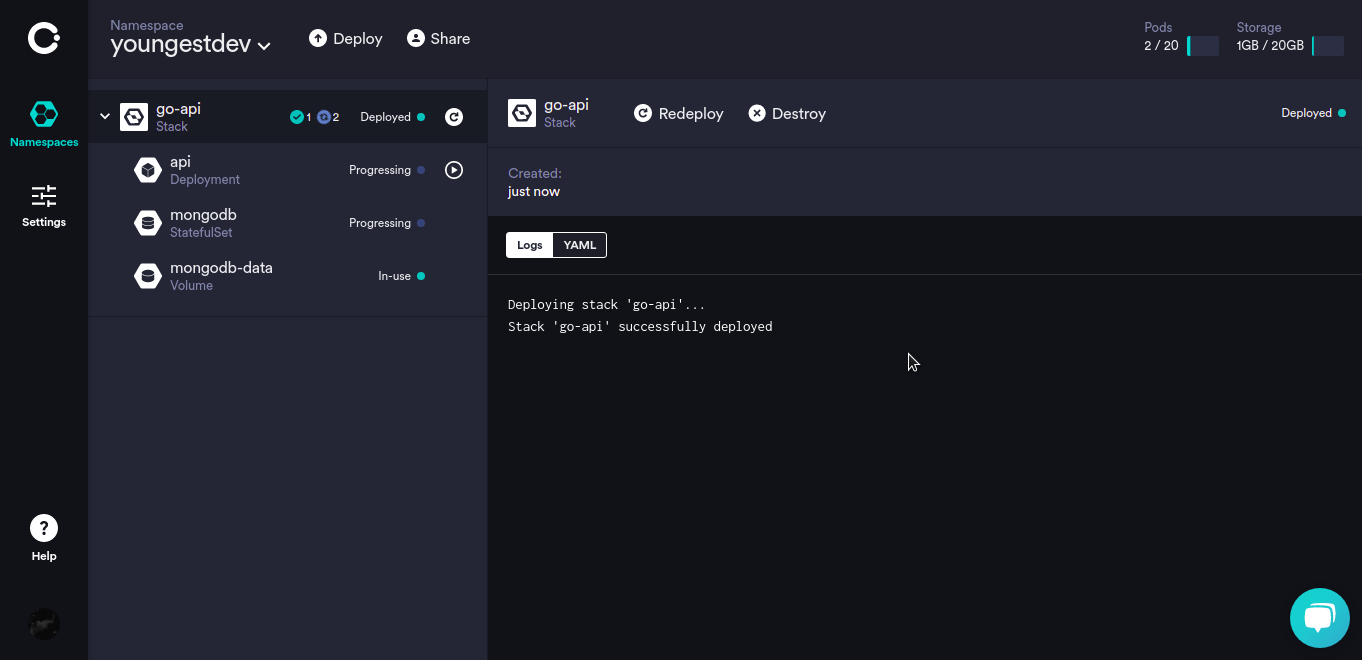
The command above builds an image of your application, then pushes it to a private registry on Okteto, and finally deploys your application.
Log on to the Okteto Cloud UI to monitor the deployment process:
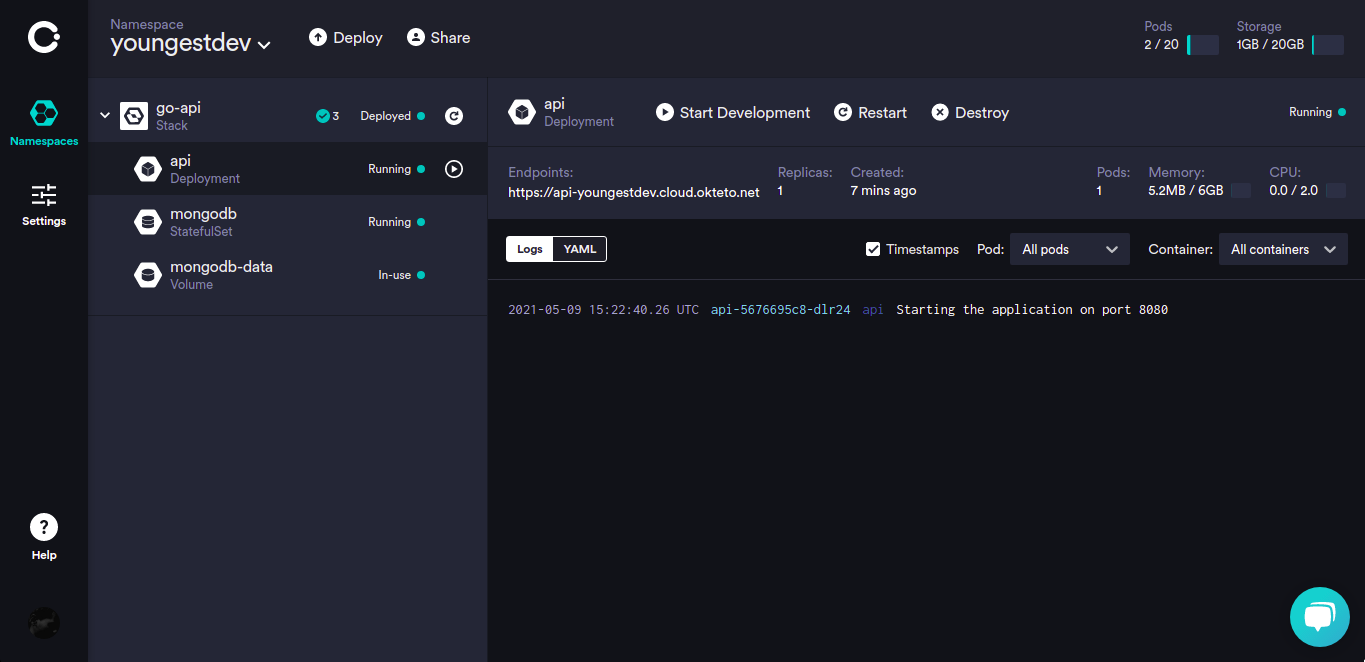
Once your application has been deployed, an endpoint will be generated automatically. Test the routes again, this time using the endpoint URL from your dashboard:
Testing the Routes
- POST route
$ curl --request POST \
  --url https://api-youngestdev.cloud.okteto.net/food \
  --header 'Content-Type: application/json' \
  --data '{
	"Name": "Fish and Fries",
	"Tribe": "United Kingdom"
}'
The above returns a response:
{
  "InsertedID": "6098001deb38dc790d445180"
}
- GET route
$ curl --request GET \
  --url https://api-youngestdev.cloud.okteto.net/food/6098001deb38dc790d445180 \
  --header 'Content-Type: application/json'
Response:
{
  "_id": "6098001deb38dc790d445180",
  "name": "Fish and Fries",
  "tribe": "United Kingdom"
}
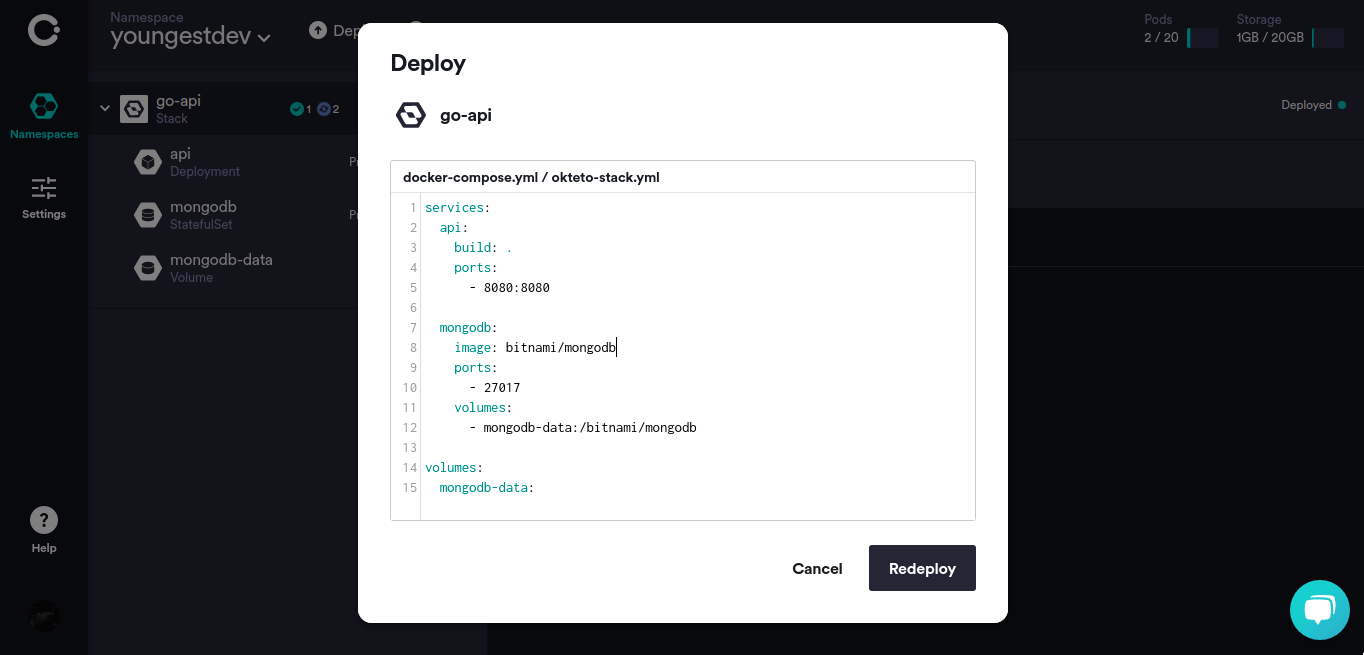
You can modify the values and services listed in your docker-compose manifest directly from the Okteto Cloud UI, and redeploy your application in one click:
Conclusion
In this article, you built an API in Golang. You also learned how to deploy an application from a docker-compose manifest file directly from your terminal using the okteto stack deploy command.
By using docker-compose with Okteto, you’re able to get all the benefits of developing with Kubernetes, such as using monitoring tools, platform services like secret management tools, and taking ownership of the release pipeline, but without the hassle of needing to learn Kubernetes.
By committing and pushing the code used in this tutorial to your GitHub repository, this application can be deployed directly from GitHub according to the steps in this article. The code used in this article can be found in GitHub


 Arsh Sharma