General Integrations
Admin > Integrations > General has the settings that connect Okteto with other tools: the SSH key that Okteto uses for Git, the token for Okteto Insights metrics, the OpenID Connect details for your cloud provider, and, when Okta is your identity provider, Okta user deprovisioning.
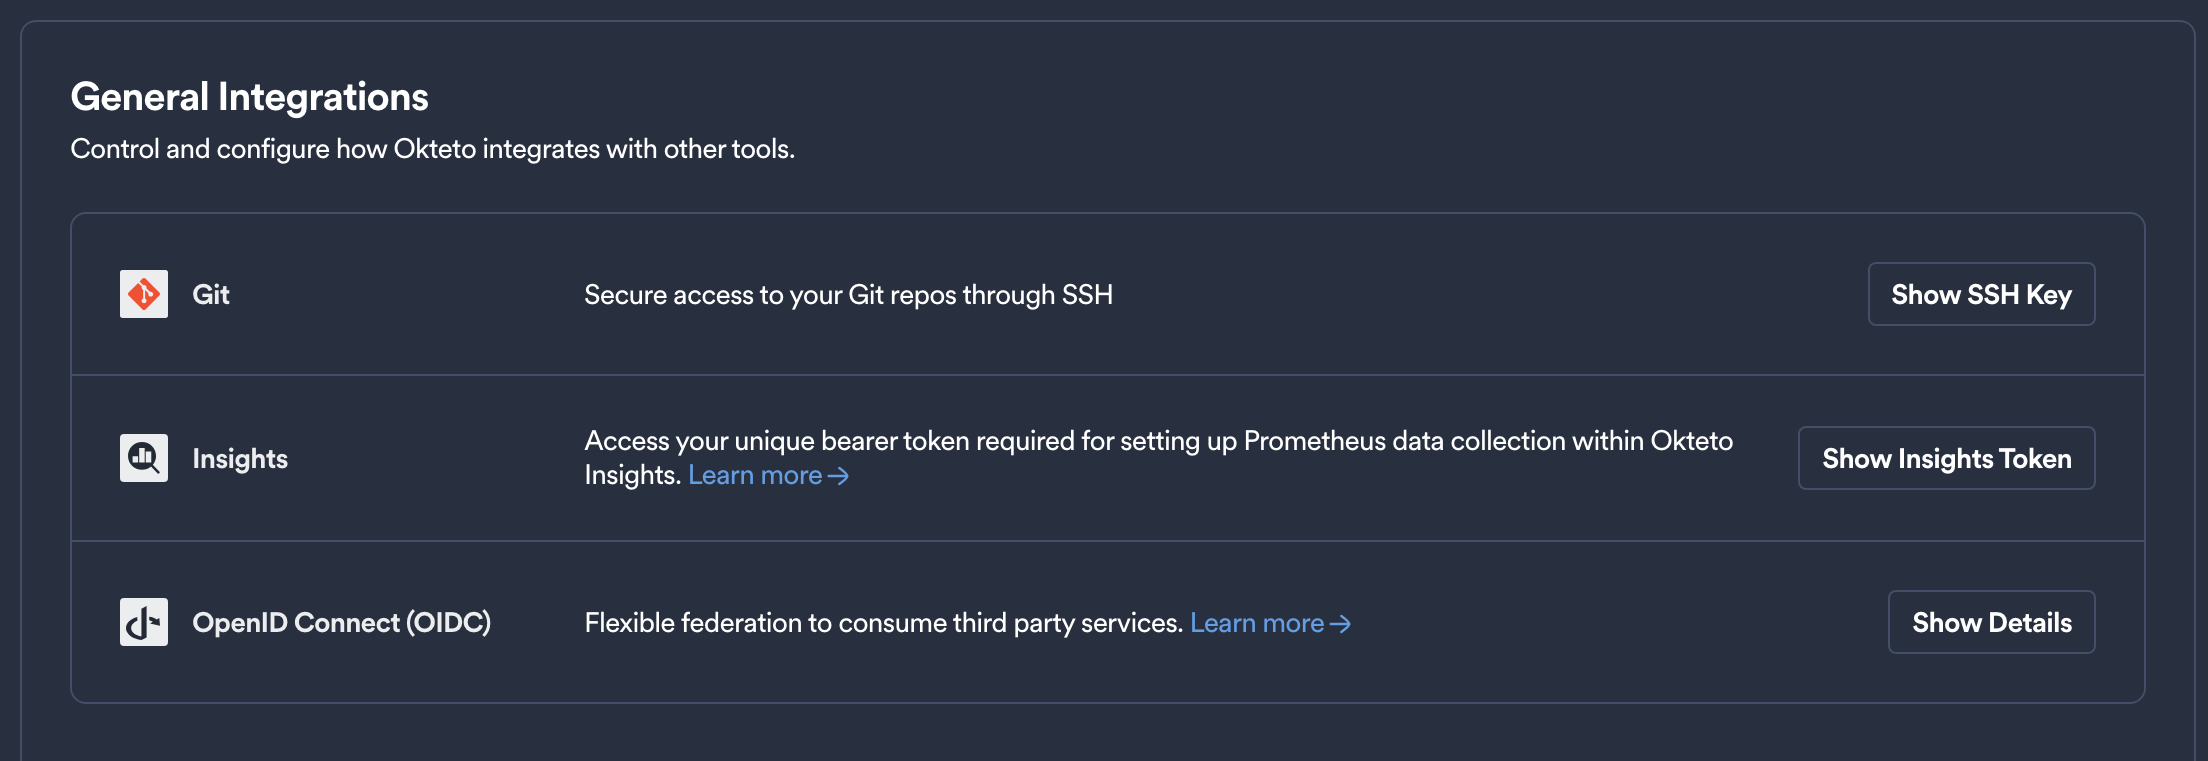
Git SSH Key
Okteto generates an SSH key the first time it starts, and uses it to clone Git repositories over SSH: when it deploys a repository from the Okteto UI or with okteto pipeline deploy, and when the commands of a Remote Execution clone a private repository.
Click Show SSH Key in the Git row to see its public key. Add that public key to your source code provider, preferably on a dedicated bot account for Okteto:
Developers can then deploy private repositories with their SSH URL, as Private repositories explains. To control which SSH hosts Okteto trusts, configure Known Hosts.
Okteto Insights Token
Click Show Insights Token in the Insights row to see the bearer token that Prometheus, or any other tool, uses to read the metrics of your Okteto instance. Okteto Insights Metrics explains how to enable the metrics endpoint and lists every metric.
OpenID Connect (OIDC)
Click Show Details in the OpenID Connect (OIDC) row to see the issuer and the subject that Okteto uses to authenticate with your cloud provider through OpenID Connect federation, without static credentials. Registry Credentials for Amazon ECR explains how to use them.
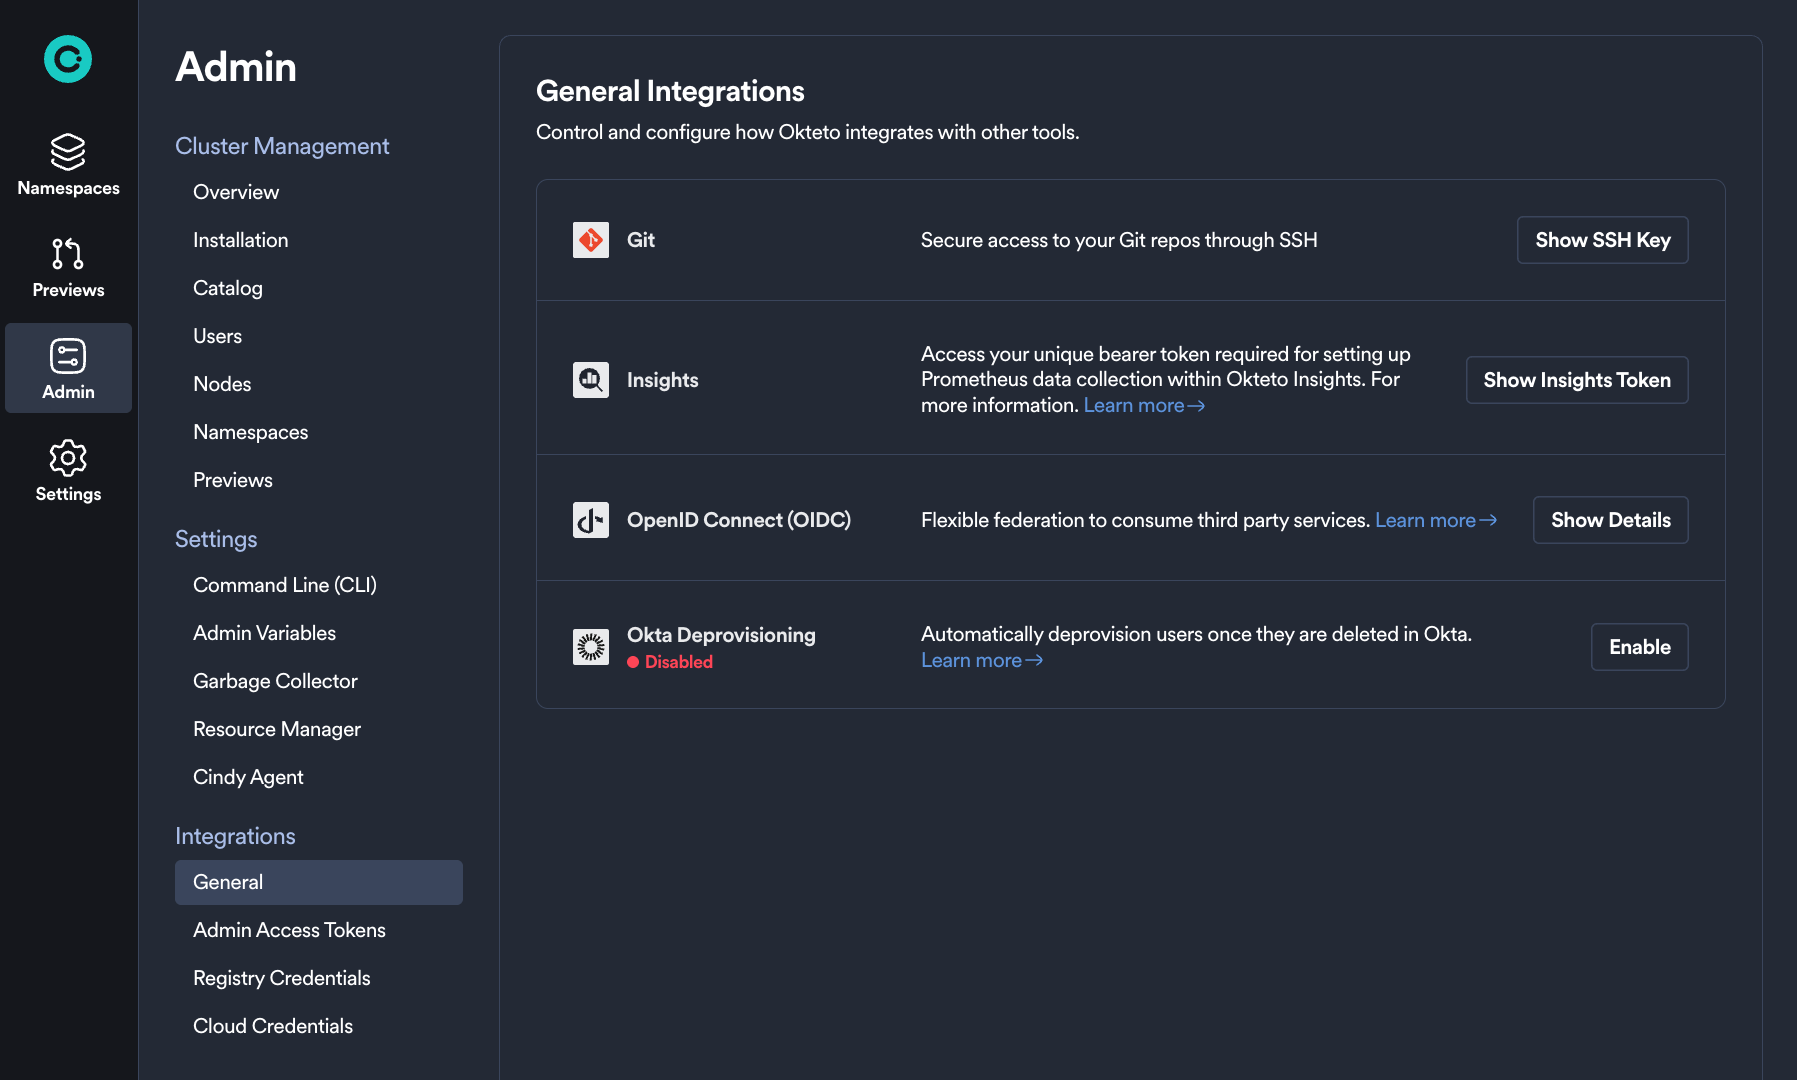
Okta User Deprovisioning
If Okta is your identity provider, Okteto can delete the account of every user that you deactivate or delete in Okta. Okta sends an event hook to Okteto for each user.lifecycle.deactivate and user.lifecycle.delete.initiated event, and Okteto ignores any other event. Okteto shows the Okta row in this section when your instance uses OpenID Connect for authentication with Okta.
1. Creating the event hook in Okta
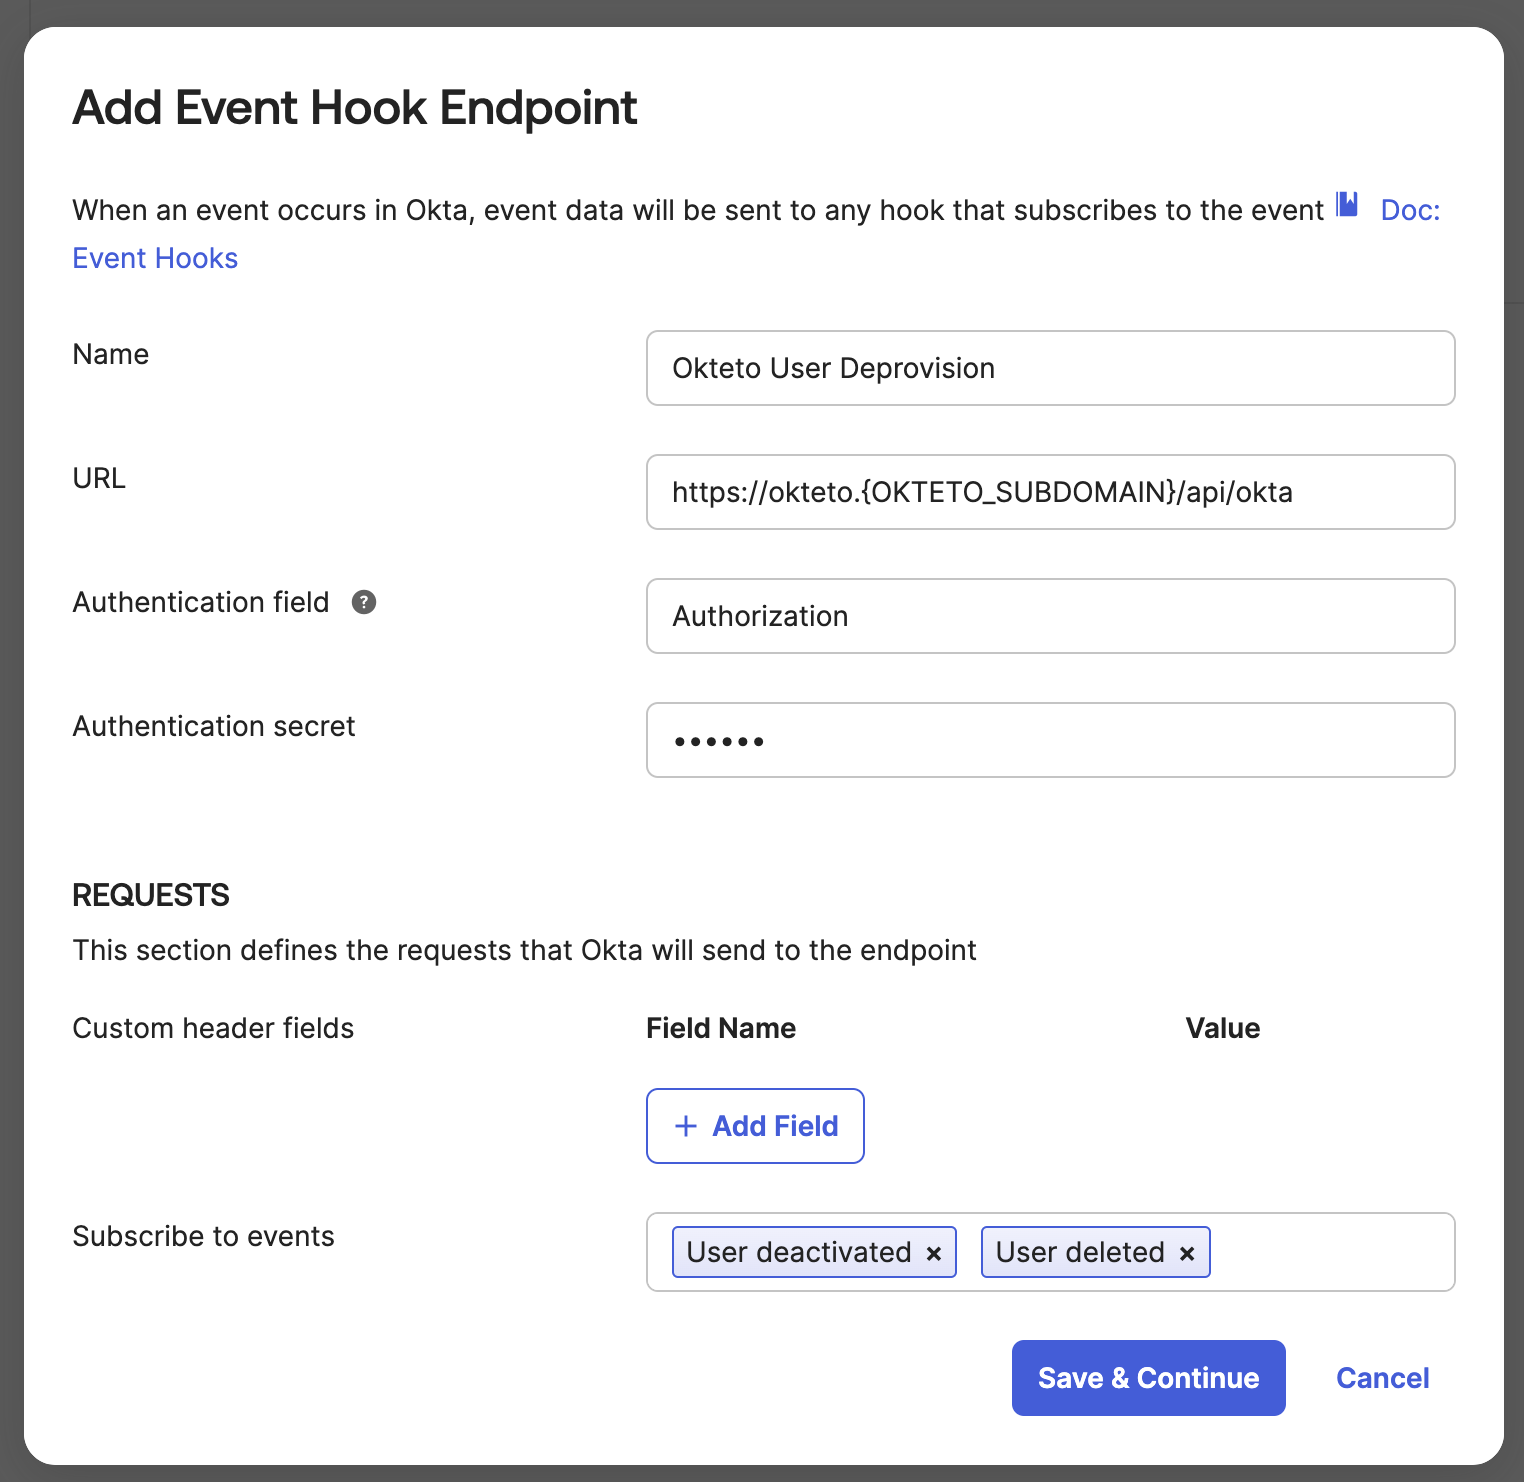
In the Okta admin console, go to Workflows > Event Hooks and create an event hook with these values:
- Name: a name that identifies Okteto.
- URL:
https://okteto.SUBDOMAIN/api/okta, replacingSUBDOMAINwith the subdomain of your Okteto instance. - Authentication field:
Authorization. - Authentication secret: a secret value that you also enter in Okteto in the next step.
- Events: User Deactivated, User Deleted, or both.
Okteto handles both events the same way. If you select both, Okteto skips the User Deleted event of a user that is already deactivated.
2. Enabling deprovisioning in Okteto
In the Okta row of Admin > Integrations > General, enter the authentication secret of the event hook and click Enable.
3. Verifying the event hook
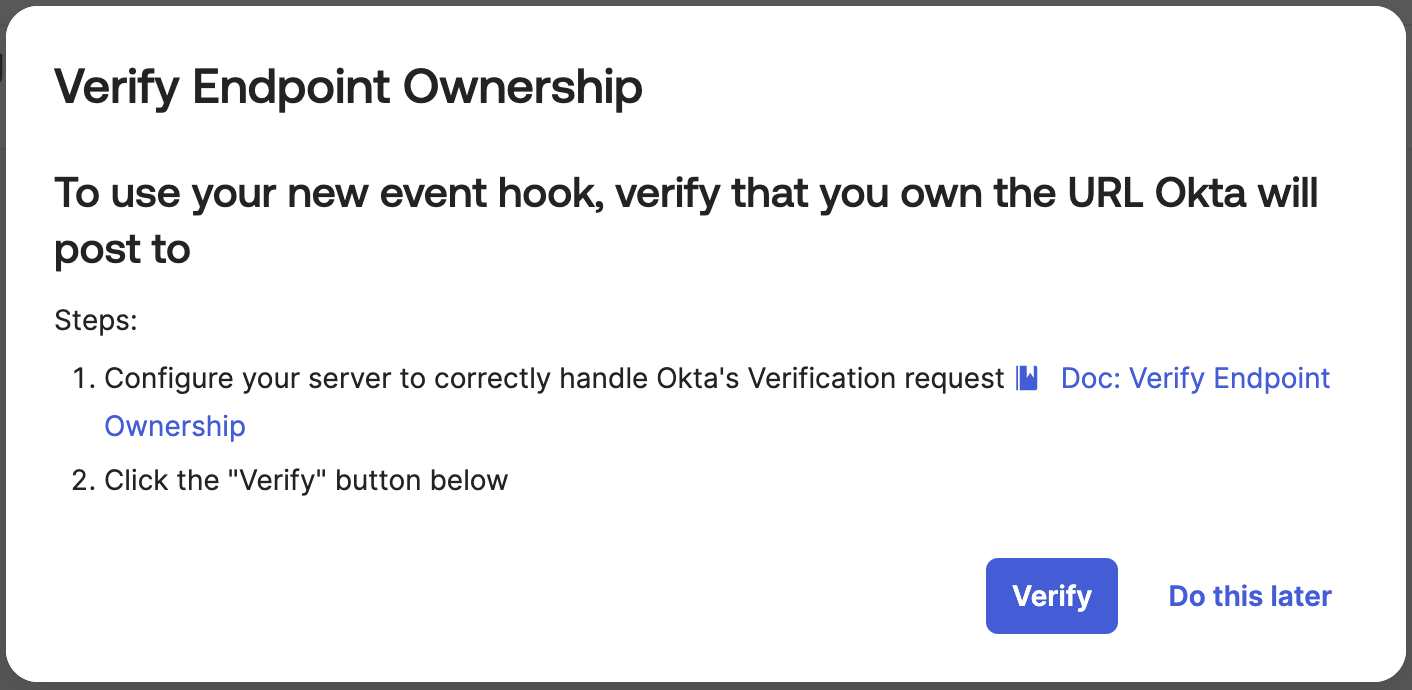
Back in the Okta admin console, verify the event hook. Okta sends a one-time verification request to Okteto, which Okteto answers automatically. After the verification, Okteto deprovisions users as Okta sends their events.
Okta lists the events it sends in Reports > System Log, which helps you troubleshoot the integration. Okta user deprovisioning needs Okteto chart 1.30 or later: on older versions, the verification fails with a 404 error.